How is your dining table looking these days? Is it a little worn? A little scratched? Is the finish looking a little dull in places? If you answered, yes, then my guess is it’s because you actually use your dining table. It’s likely a place you love to sit, eat, craft, and have family time. What if I could show you how to refinish that table and give it a natural finish that is actually intended to look better with age. Today’s furniture makeover is a natural finish dining table.
I remember where I get almost every piece of furniture I refinished. It may be from a thrift store, from a family member or friend, or from the sidewalk. If it was a curb-side find, I can tell you, if not the exact house, the neighborhood where I found it. I can actually picture it sitting on the sidewalk.
So it boggles my mind that I cannot remember where I got this table. I’m pretty sure it was a curb-side find, but I can’t for the life of me remember where I got it. Hmmmm. It must have been nearby though because I really haven’t been going far lately. This is what 50 does to the mind I guess. [ #MenopauseBrain]
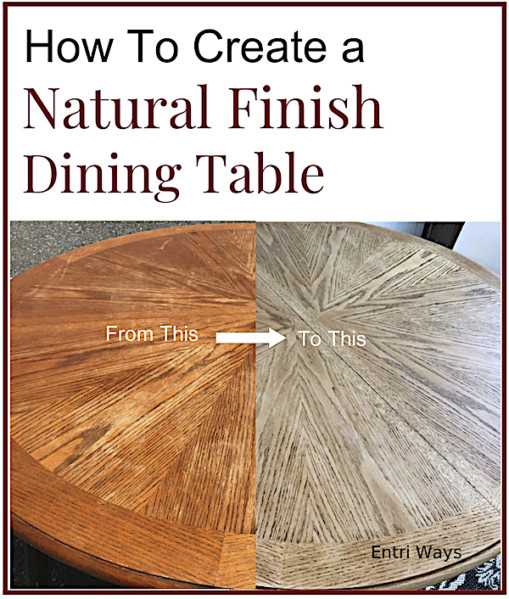
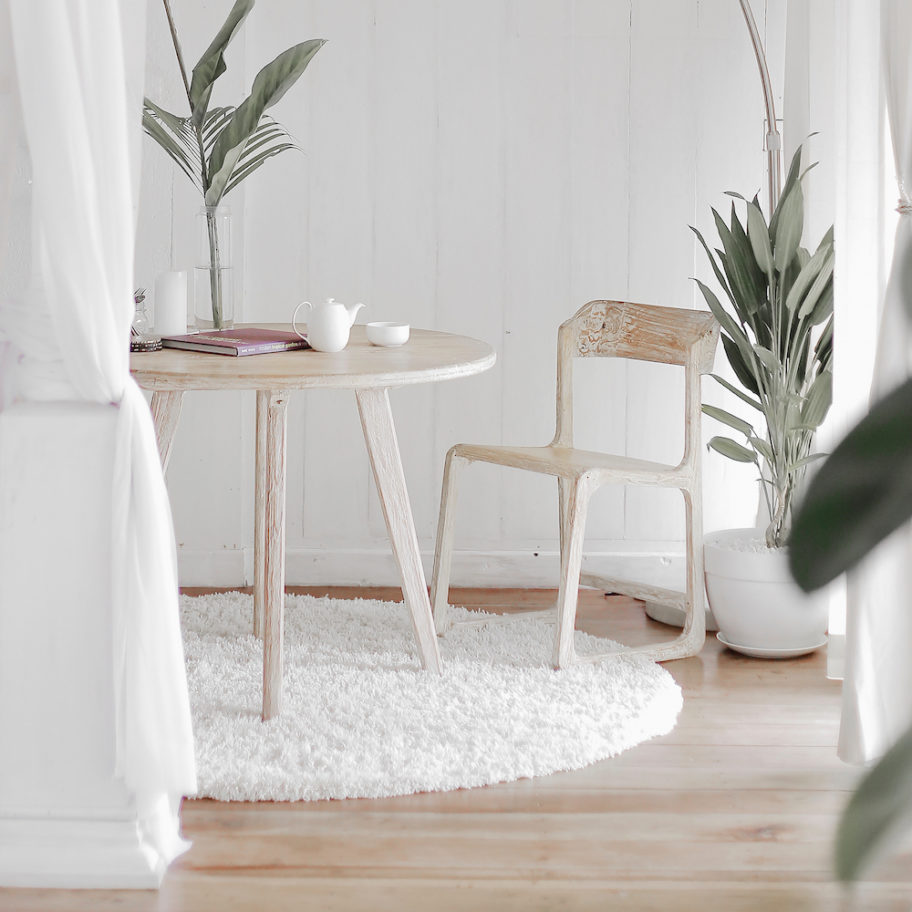
Regardless, this is an amazing claw foot dining table with a star design. I’m going to show you how I took it from a really worn, scratched, orange finish to a natural wood tone that will wear well over time.
And I’m going to show you how I did it in just two, easy steps!


Step 1: Sand
I’m guessing you won’t be sad to see this 1990’s orange color go during the sanding process. One day I’ll have to experiment and figure out exactly how they created this orange finish. Polyurethane turns wood more yellow than orange, so I’m thinking a stain was applied under whatever clear coat was used.
Using a Craftsman rotary sander with 60-grit sanding discs, I sanded back the finish. This video shows the sanding process. Even I was surprised at how easily the finish came off this table. This tabletop took less than 30 minutes to sand. This never happens. Most take a few hours. Take a look…
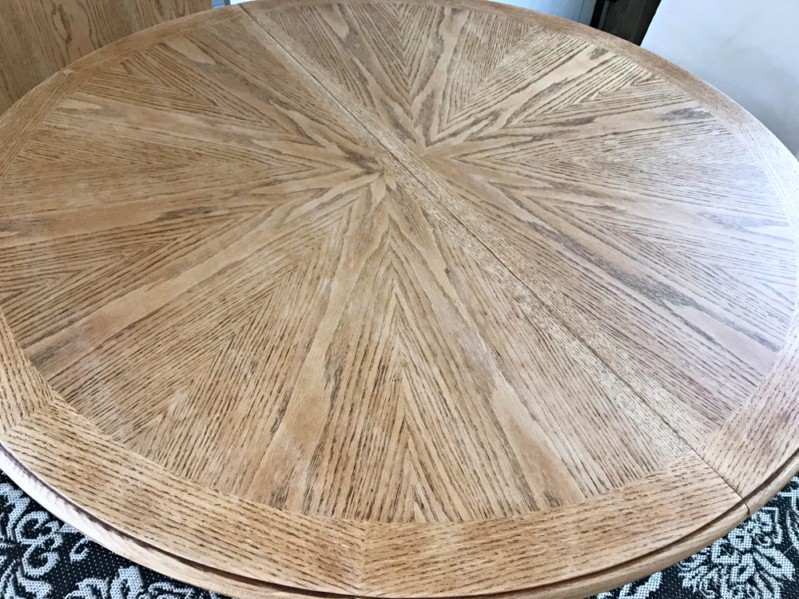
Look at that before & after! No more orange! The ‘after’ photo is after more sanding than shown in the video and after the clear coat was added. What a difference!
Step 2: Add a Clear Coat
To protect the natural wood, I added a clear coat to protect it. But since there’s no stain to scratch off, the wood should wear well and develop a naturally aged or naturally worn look over time. Imagine those 100 year old solid wood tables from Europe. It may not last quite that long, but that’s the idea and look I’m going for.
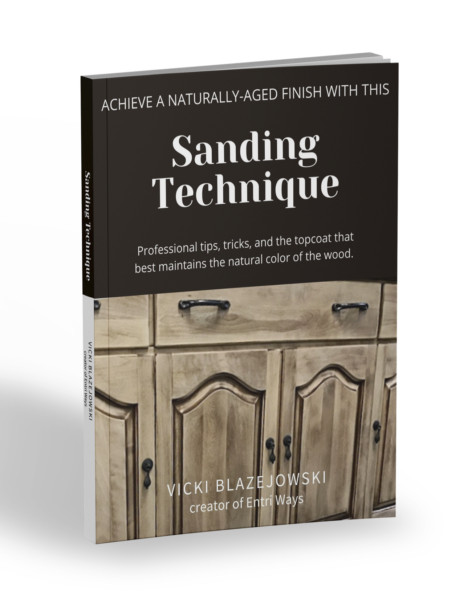
If you’d like to learn more about sanding furniture back for a naturally-aged look and the exact topcoat I use to protect the natural wood without changing the color of it, click the ebook below…

Did you notice the starburst pattern on top?


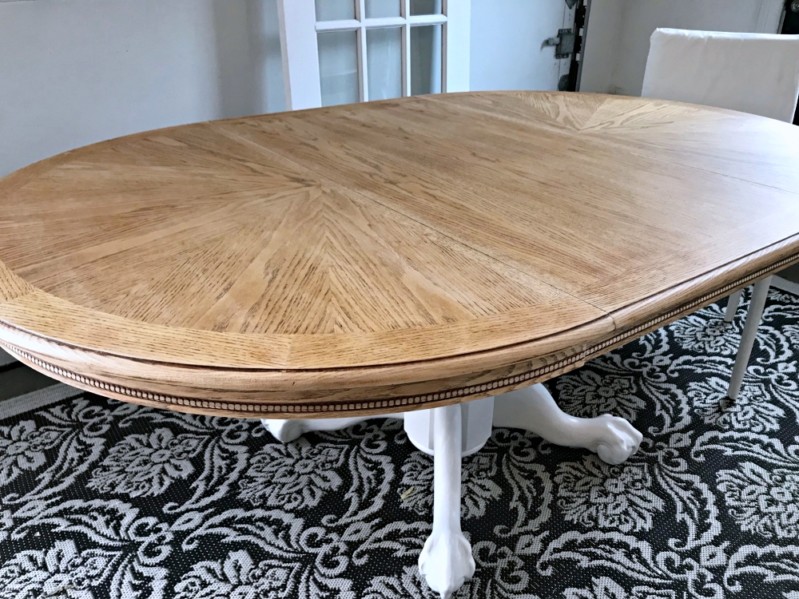
Optional: Painted Base
The clawfoot table base was more of a challenge. I tried, but the finish did not come off nearly as easily. Between the rotary sander and some hand sanding, most of the finish was removed.
In the end, I opted for a painted base, figuring this table, like the one I have in my kitchen, could be paired with some off-white (winter-white) chairs. I really love this color combination.

The base was primed then painted with a custom mix of white enamel (for durability) and a latex khaki paint I had in stock to bring it from bright white to a softer winter white that blends well with the warm wood tones.
This base would also look beautiful in a really dark (almost black) gray because there are also some dark tones in the wood. The darker color on the base would pair well with darker chairs.


Visit Entri Ways’ online shop.
Disclosure: This post contains affiliate links to products I use myself.


I love the starburst pattern of this table and how it was highlighted by your sanding job! What would you do if a table has a veneer? Can you still sand it and re-coat it with poly?
Thank you Amy! If it were veneer (which is a very thin wood), you can sand it and re-coat it. But because it’s so thin, you’d have to be very careful not to sand thru the veneer (which can easily happen). With this particular sanding technique where I’m going for a naturally-aged look, I’m digging deep with the sander in some sections to remove the stain and lighten the wood and leaving the stain heavier in other sections. That’s more difficult to do with veneer.
Hello ! I purchased an _EBook
On the sanding technique for the old world look of that table and I cannot find the PDF as noted ! Can you please help ! Thank you
Tracey, I just send you a separate email with the ebook. Thank you.