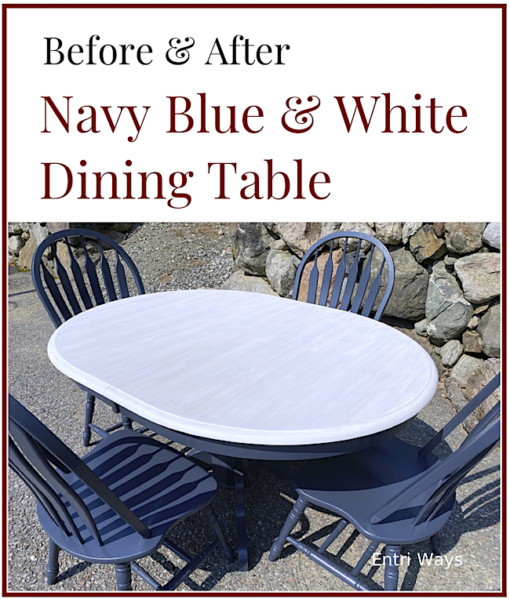
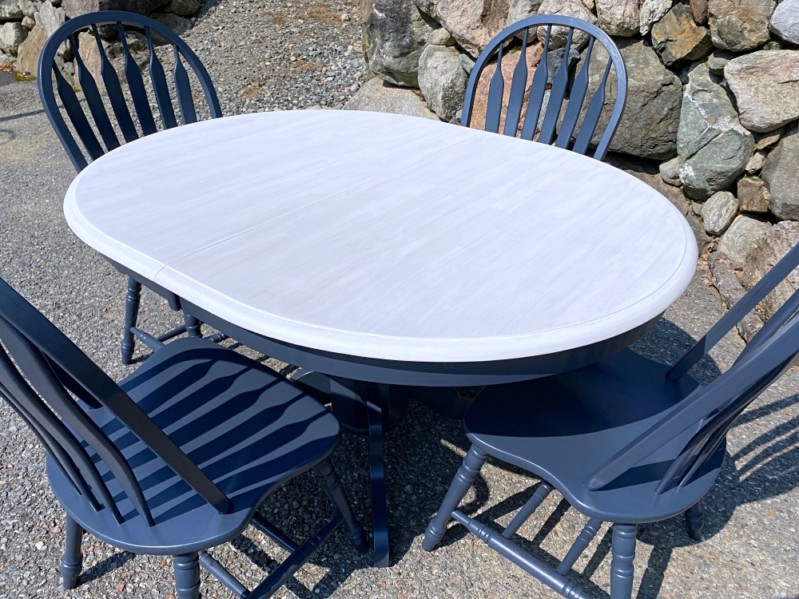
Blue and white interiors are a classic and will always be in style. Because if you love blue & white… you love blue & white and it will always be in your home. So why is finding a dining table to match a blue & white interior so difficult? Not this week. Today I have a navy blue & white dining table makeover for you.
.
Supplies List
- Solid wood dining table
- Dewalt rotary sander
- 5-inch 8-hole 60-grit sanding discs
- 80 grit sand paper
- 150 grit sand paper
- Minwax Semi-Transparent Wood Stain – pure white
- Benjamin Moore Stays Clear topcoat or Minwax Polycrylic topcoat – flat finish
- Benjamin Moore enamel paint – navy blue
- 1.5-inch angled, nylon paint brush for paint
- 2.5-inch straight, white, natural bristle brush for clear coat
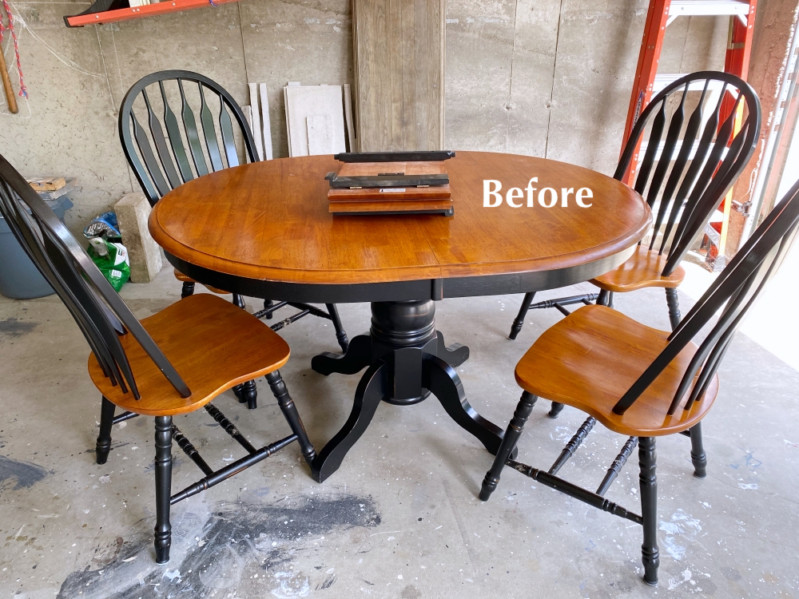
Remove the Old Finish
The first step is to remove the clear topcoat and orangey stain. You can do this by either sanding the finish off or removing it with a liquid chemical stripper. I sanded this table with a Dewalt rotary sander and 60-grit sanding discs outside while wearing a P-100 rated vapor mask.
.
Lightly Sand the Painted Finish
The factory paint finish was in excellent condition, so I lightly scuffed up the black with some 150 grit sandpaper.
.
Prime
If you choose a light paint color, then absolutely paint on two coats of primer. Even if you choose a medium or dark color paint, most paints will need a primer to properly adhere, especially latex paints.
.
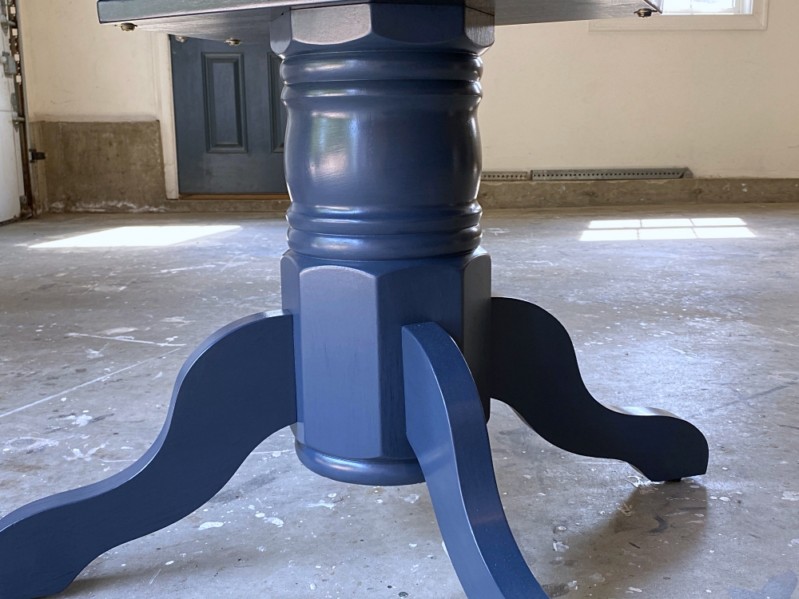
Paint
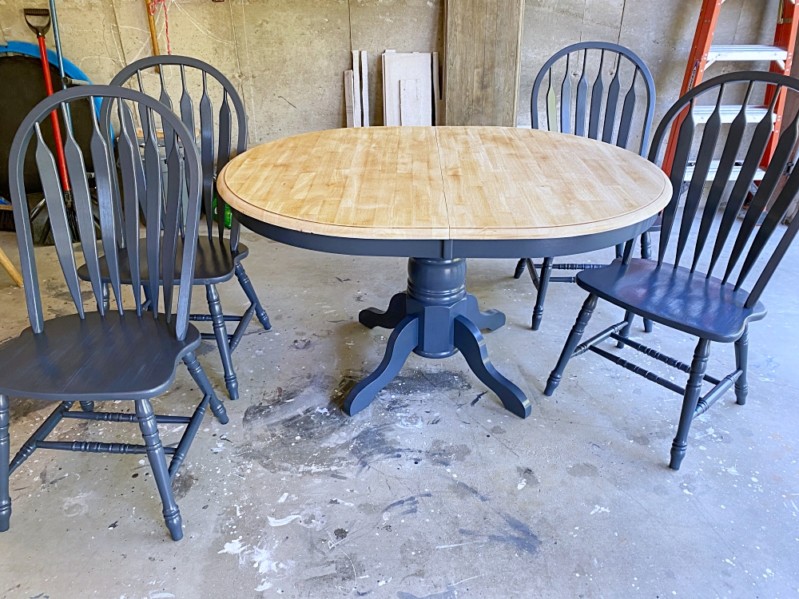
The Benjamin Moore enamel paint I work with adheres exceptionally well and I was painting a dark navy color over the black, so I did not need to add primer in this case.
The navy blue color I used is custom-mix. It’s sort of a cross between Benjamin Moore Polo Blue, Hale Navy, and Royal Blue.
To learn more about the exact brand of acrylic enamel paint I use and how to manipulate it to minimize brush marks, refer to my PAINTING FURNITURE ebook HERE.

.
.
Use a Quality Brush
You can paint with almost any brush, but it really is true that the better your brush, the better the painted finish.
Now, I only use a super trim Purdy paint brush to paint furniture. THIS 1.5-inch angled Purdy brush is thinner than every other brush I’ve seen on the market, making it easier to keep just a small amount on paint on your brush and work with it.

.
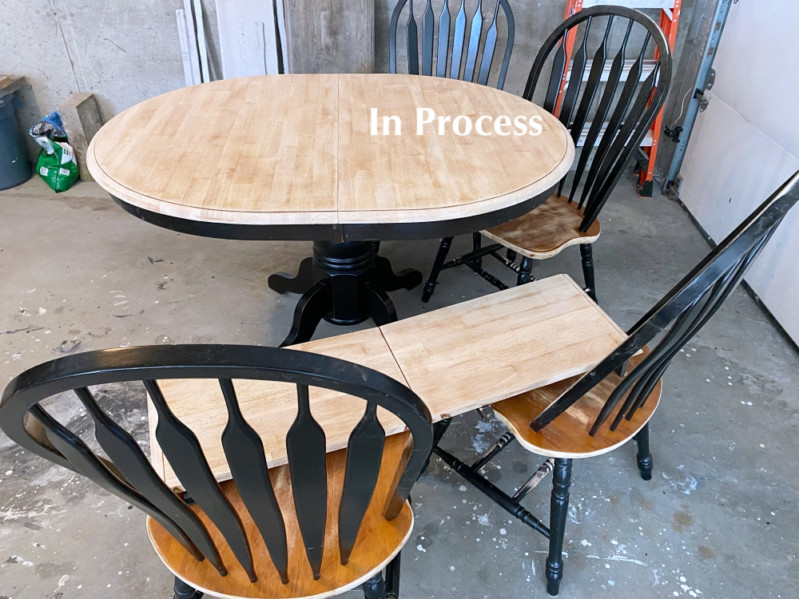
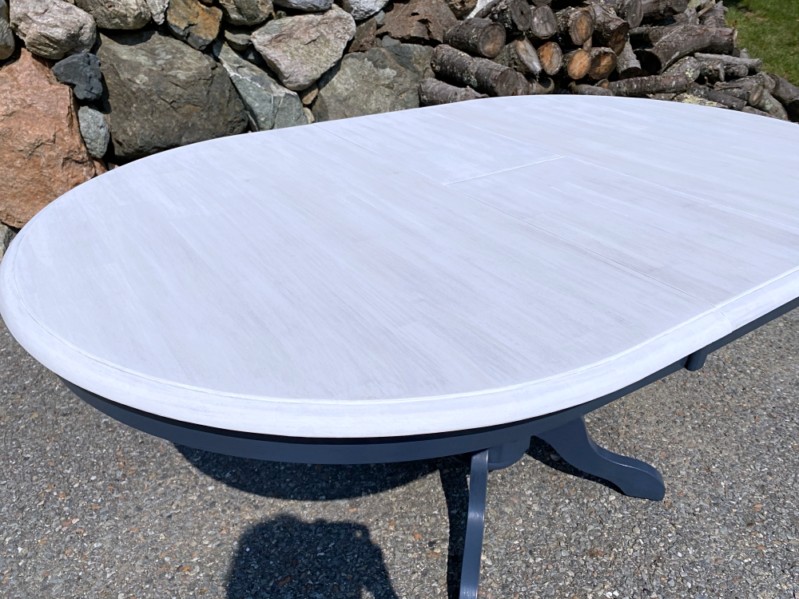
Apply White Stain to the Tabletop
The Minwax semi-transparent white stain gives really nice coverage yet still allows a small amount of the wood grain to show through.
Pour a small amount of the stain into a separate plastic container. Cut a section from a white t-shirt (about 8″x8″). Fold it flat so no cut or frayed edges are showing. Dip into the stain and wipe onto the table in the direction of the wood grain.
The can may state to use a brush, but I’ve found a rag works better because it removes the excess stain as you go and you do not end up with any air bubbles.
By the time you stain the entire table once, it should be dry enough that you’ll be able to start at the beginning and add a second coat. Maybe even a third.
Let dry overnight and if you’d like the table whiter, add a fourth coat of stain.
.
Brush on a Clear Topcoat
Allow the final coat of stain to dry a full 24 hours (48 hours if the weather is more humid). Brush on a clear, water-based topcoat. Allow 3-4 hours to dry. Very lightly sand with 150-grit sandpaper to remove any air bubbles. Apply a second coat of clear. Lightly sand. Apply a third coat. Do not sand after the final coat of clear.
Choose a water-based polycryclic or acrylic polyurethane for the clear when applying over a white stain. These water-based products will not discolor (will not cause yellowing) like an oil-based product would.
For this table I used a flat finish. A low-lustre or satin finish with more sheen would work well too; but if this is your first time working with a clear product, use the flat since it’s most forgiving and will not show brush marks like the higher sheens may.
I do not use the trim, angled Purdy brush to apply the clear topcoat. Instead I use a fluffier, straight, white, natural bristle brush like this Purdy brush in order to apply more product to the brush.
Pour about 1 cup of the product into a separate, clean container (never work from the can). Dip the brush into the clear liquid (which will look cloudy from the can but dries clear). Brush onto the table, but only go over it 1-3 times. It will begin to dry quickly so you cannot play with the product by brushing back and forth the way you do with paint.
There will be areas that you miss adding product to, this is why you’ll add at least three coats to the table – to ensure coverage on every area of the table. If you apply product, brush over it 1-3 times to even it out, then notice you missed a section because there wasn’t enough product on your brush, leave that section and move to the next. If you try to go back and add more to the wet (now drying) area, it will only cause damage to your topcoat. Allow the table to dry and apply a second coat to cover the missed area.
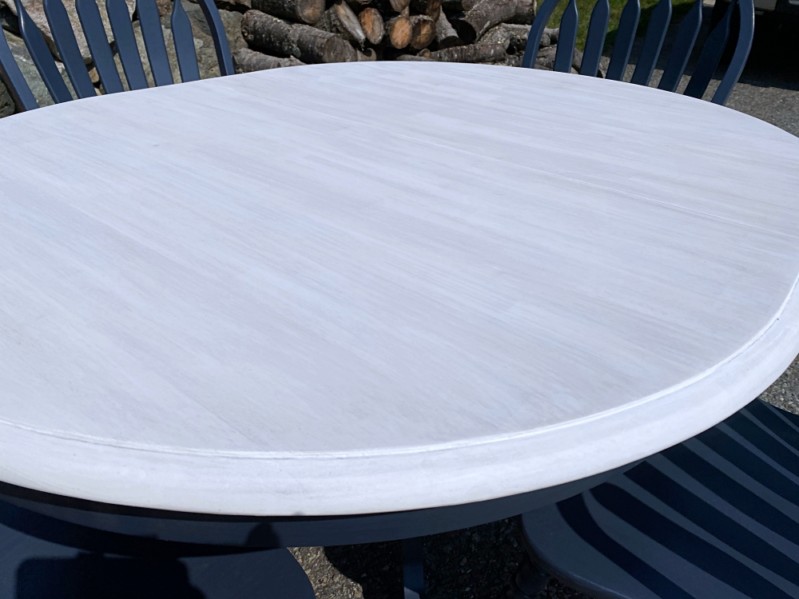
The result… is light and bright. Has contrast and shows layers rather than a flat, single-layer finish.

.
.

.

.
.
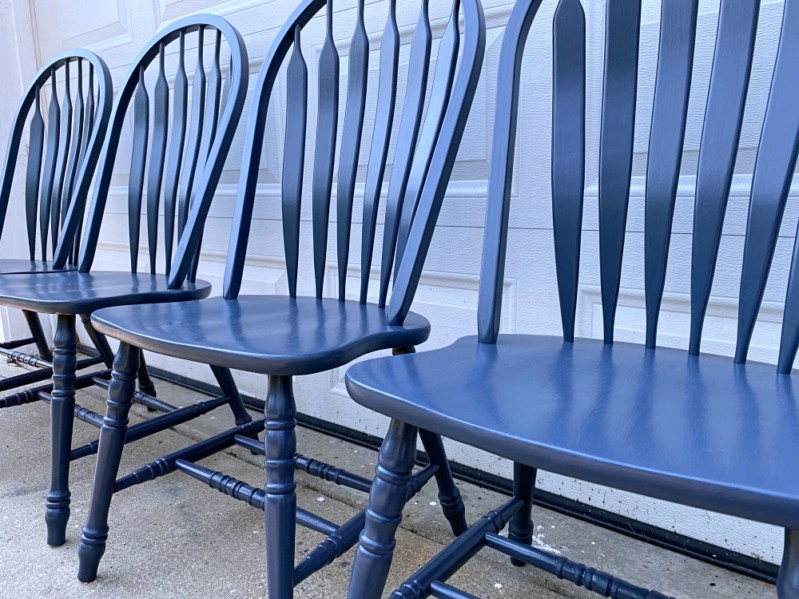
This navy blue and white stained table and set of four navy blue chairs is available to purchase. See the listing HERE.
.
Disclosure: This post contains affiliate links to products I use myself.


That looks lovely!
Thank you so much Joanne. The black base was nice, but I really love navy.