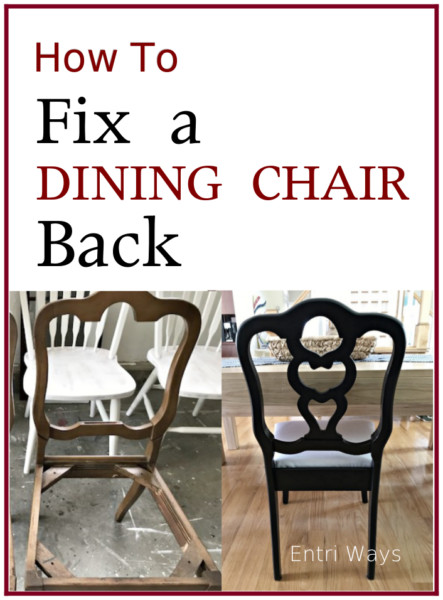
Making small repairs to furniture is a necessity in my business. Furniture gets warn and pieces break over time, but that doesn’t mean they need to be sent to the trash pile. Often, they just a need a little repair work. Today, I’m going to show you how to fix a broken dining chair back. And, yes these chairs are now available for purchase in the Entri Ways’ shop.
The neighbor of a close friend set this set of six chairs out on the sidewalk a few weeks ago. Knowing I’d want them, my friend called me right away. I’m so happy she did!

When I arrived the homeowner was outside so we started talking. She had intended on refinishing them herself, just never got around to it and was running out storage space. So it was time to let them go rather than allow them to clutter her home.
I admire her for making that decision. It’s hard to let go of great furniture pieces and projects you will some day complete; but I can assure you that you will feel even better clearing them out so they don’t clutter your home or mind. Breathe easier knowing someone else will finish the job and another family will enjoy the furniture.
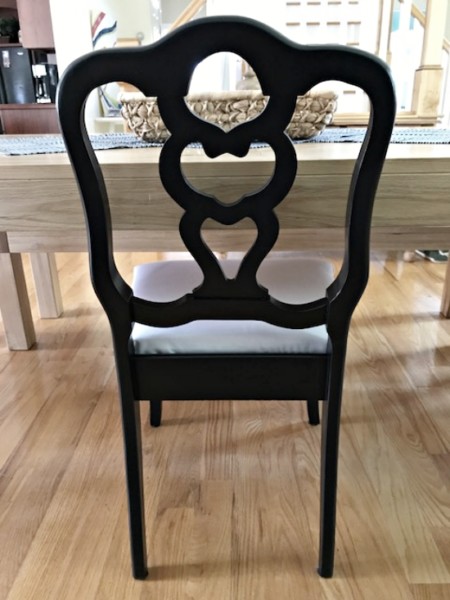
The chairs are almost identical to these chairs I refinished last year so I knew they would look amazing in black.
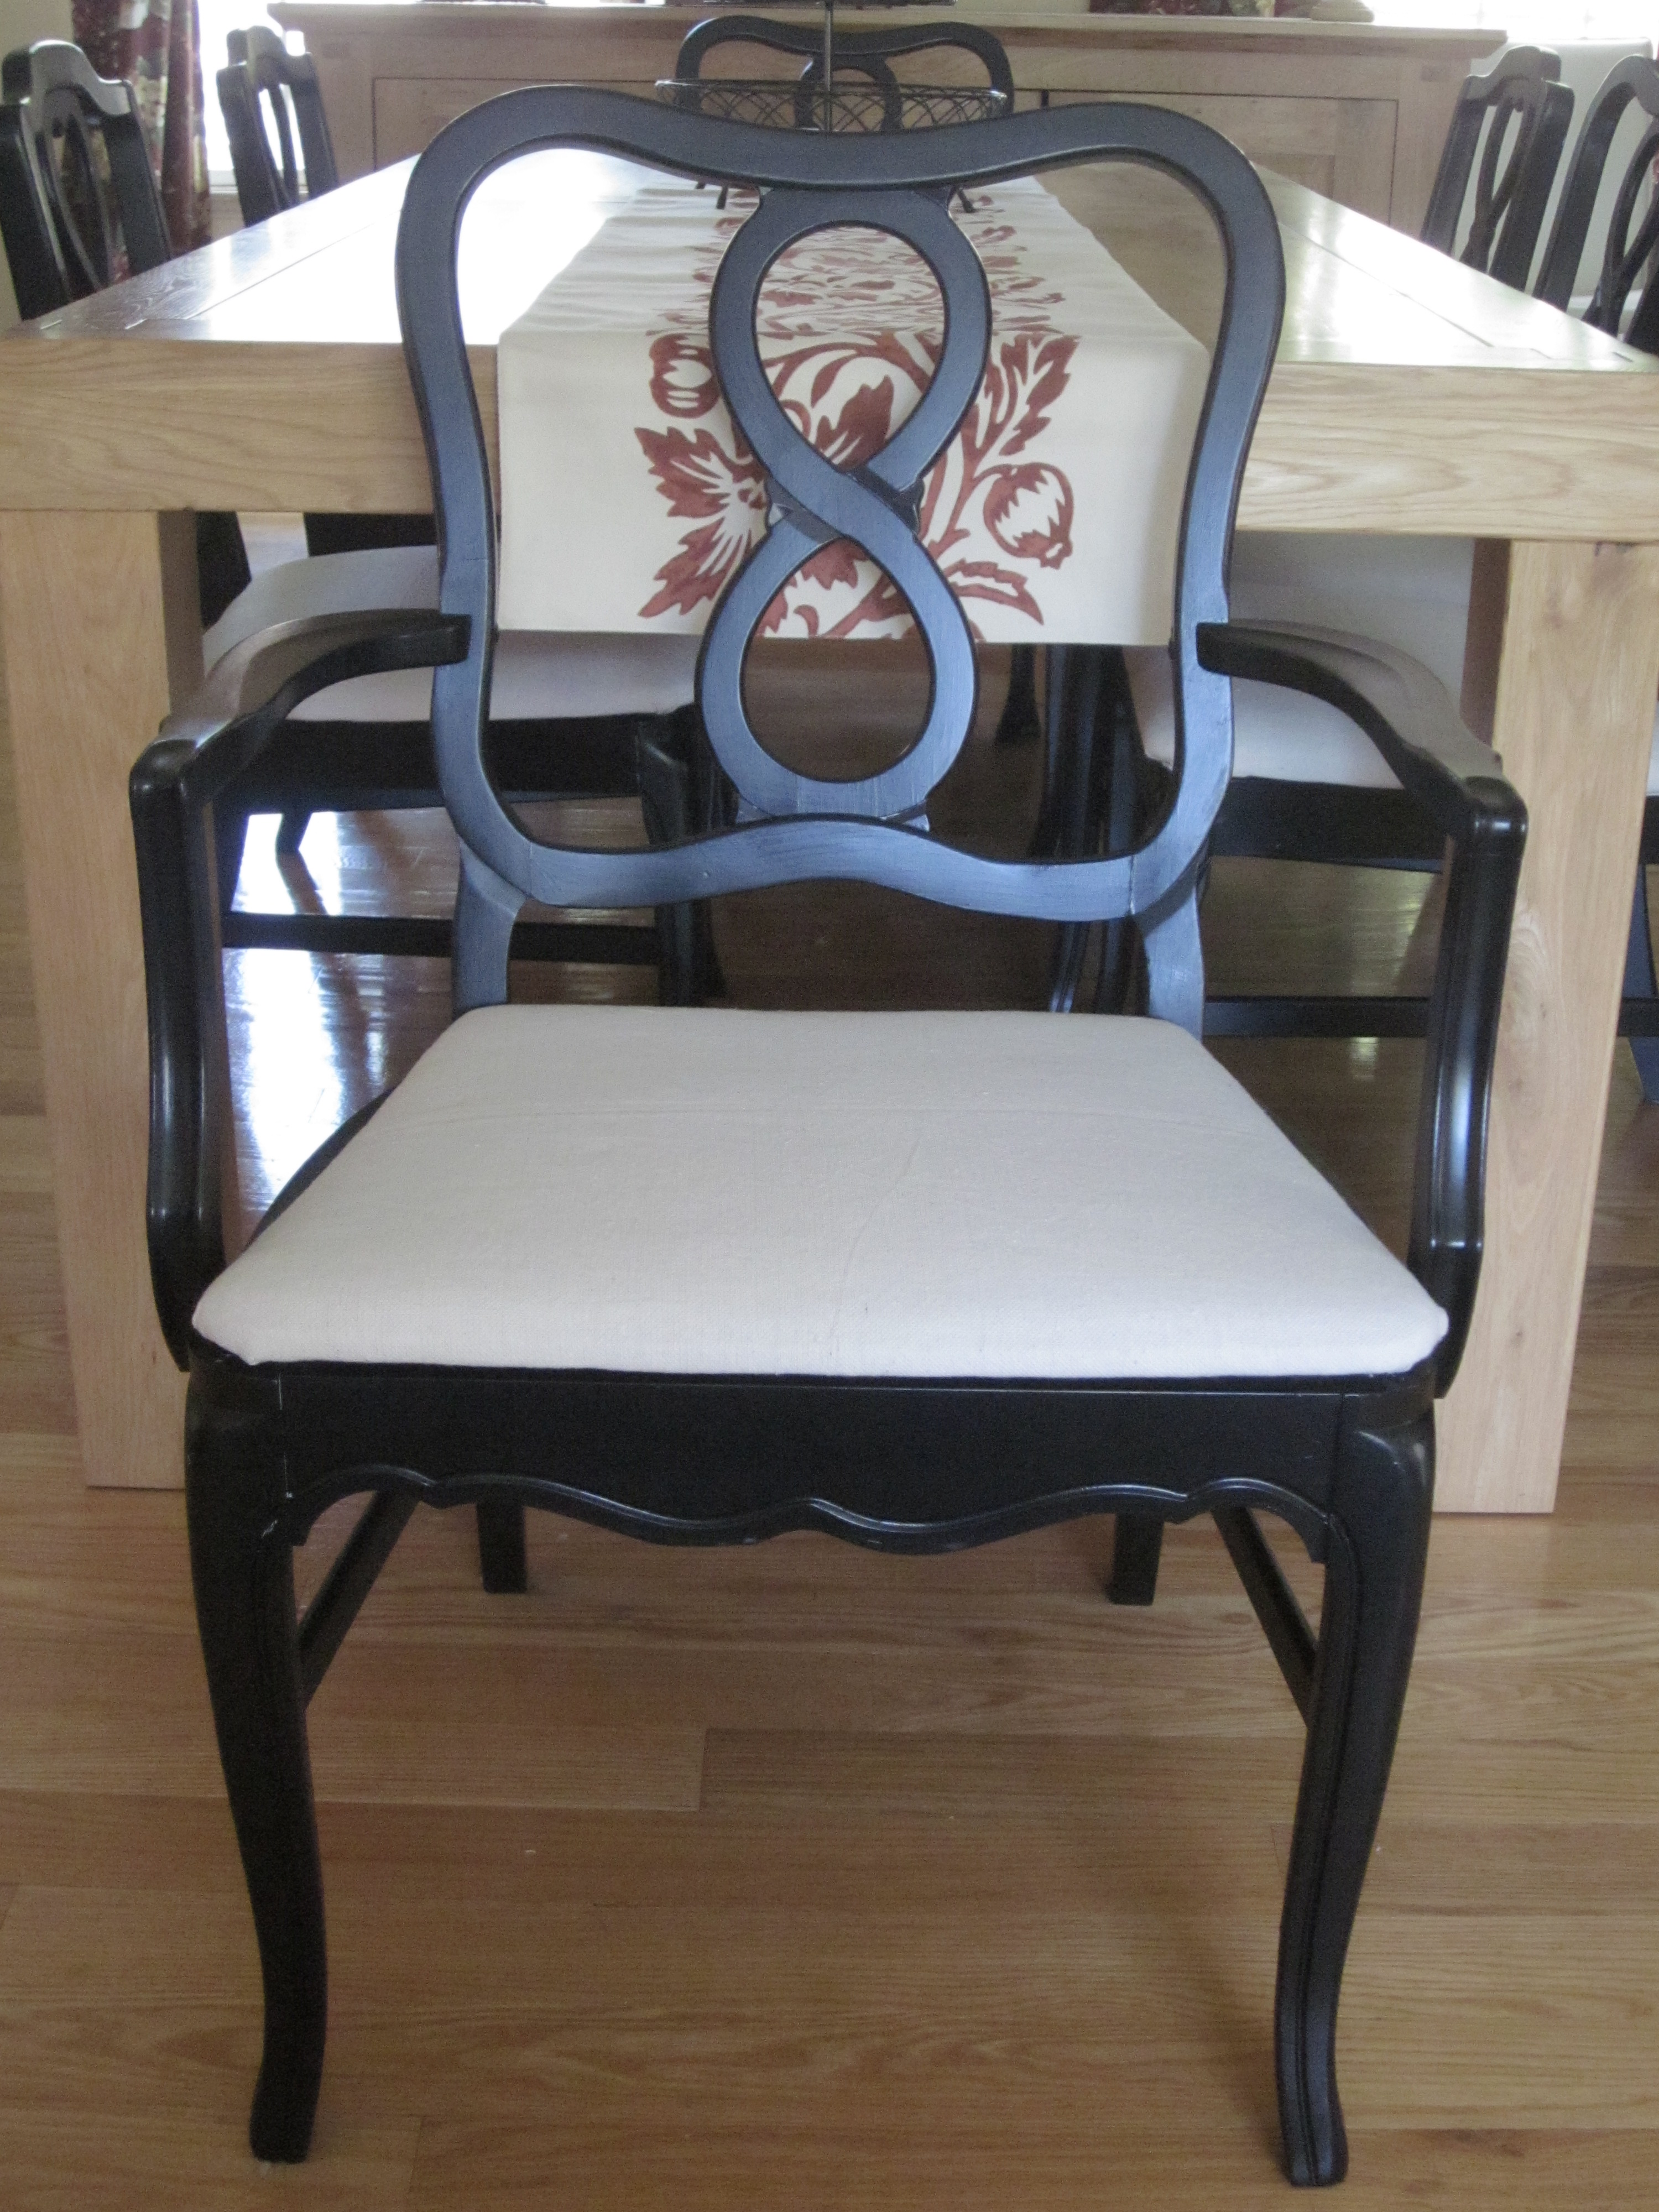
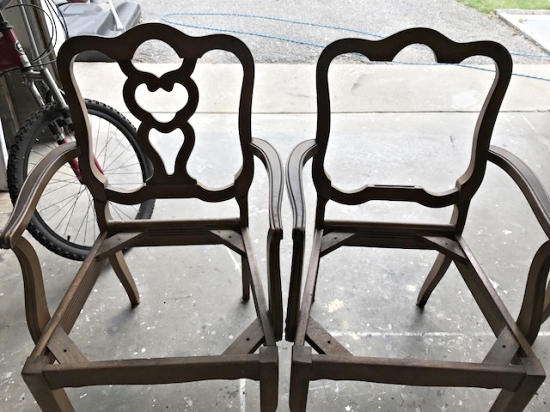
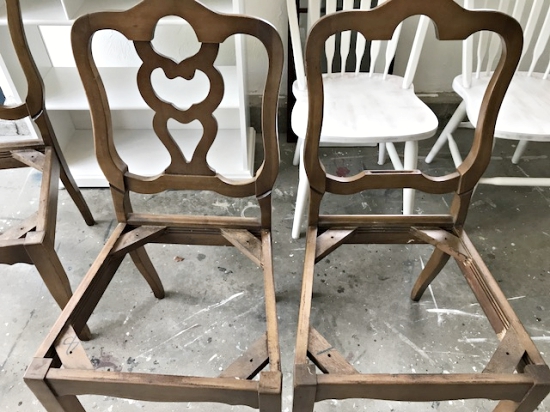
The set of chairs included two arm chairs and four side chairs. They appeared to be solid wood with the exception of the cut-out backs which are wood veneer over wood. You’ll see why later in this post.
The only real issue with the chairs is that two of them were missing the chair backs, otherwise the chairs were very well-made and sturdy.
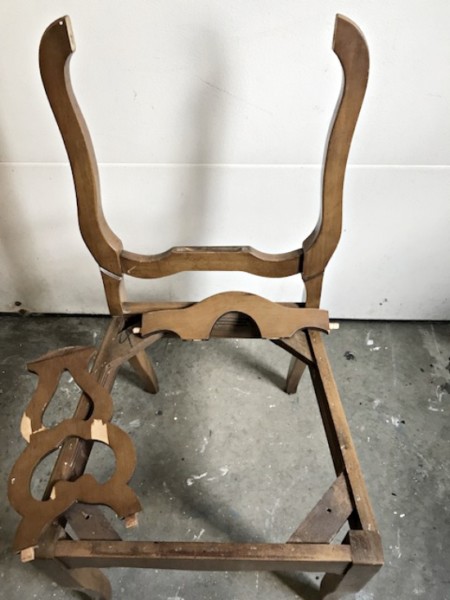
Repairing these chair backs, requires taking them apart, duplicating the cut design, and putting them back together.
Most chairs appear to be one solid piece, but they in-fact are several pieces that are secured together with wood dowels and glue. If you look very closely at the the chair backs, you’ll see a seam where two pieces meet.

Heat along the seam with a heat gun to melt the glue. We used hair dryer and it worked perfectly. Then, while one person holds the chair in place, a second person places a wood block on the inside of the chair back and carefully hits it with a hammer to separate the two pieces. The wood block creates a buffer and more evenly distributes the force. Do not hit the wood of the chair directly with the hammer or you’ll dent and possibly break the wood.
Repeat this process to remove the cut-out back from the top and bottom areas.
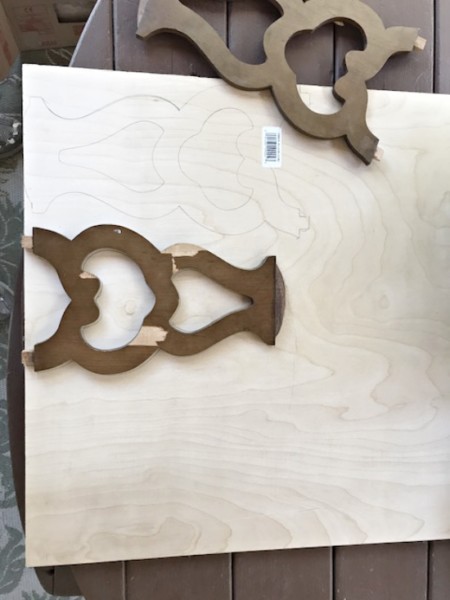
Now trace the cut-out onto a piece of wood. The wood needs to be the same thickness as the original cut-out. I used a piece of birch wood lauan plywood. Lauan is sold in small sheets at Lowes for around $5 to $8 each. You’ll find it in the very back corner of the lumber section. Or, you can find lauan here on Amazon.
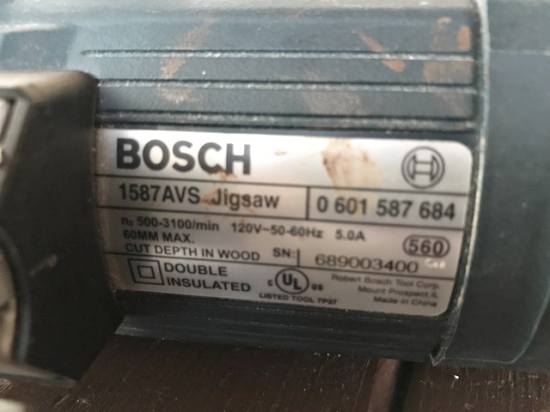
Very carefully cut the shape out using a jigsaw. A professional contractor recommended a 120-volt Bosch jigsaw to me. He said he’s tried others, but they don’t turn the corners as easily or cut as well as this one pictured. It worked really well, even on the tight corner cuts.
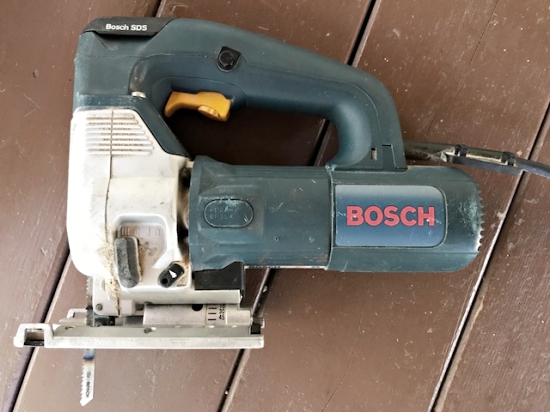
To cut the inside areas, first drill a wide pilot hole (wide enough for the jigsaw blade to be inserted) with an electric drill.
Once the cut-out is complete, insert and glue it back into the back of the chair. Use carpenter’s wood glue at all the seams to ensure a secure, long-lasting fit.
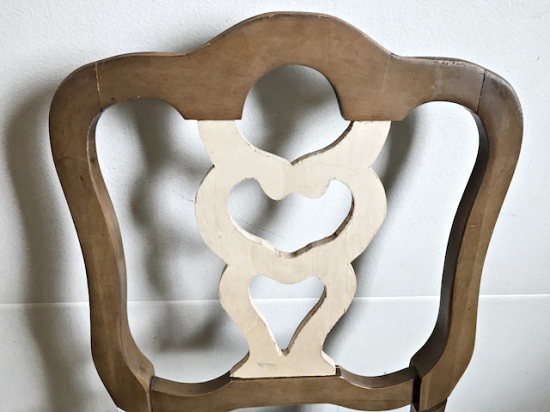
The edges of your new cut-out will be rough so you’ll need to sand them until smooth. Even after sanding they will still be a little rough. The original chairs had thin pieces of veneer glued all along those curved edges for a meticulously smooth finish, but my new cut-out don’t. Instead, I used Elmer’s Carpenter’s Wood Filler to smooth them.
Simply rub the wood filler all along the rough edges with your finger, filling in any dense holes. Let dry overnight, then come back and sand off the excess.

You’ll be left with a smooth, paintable finish.
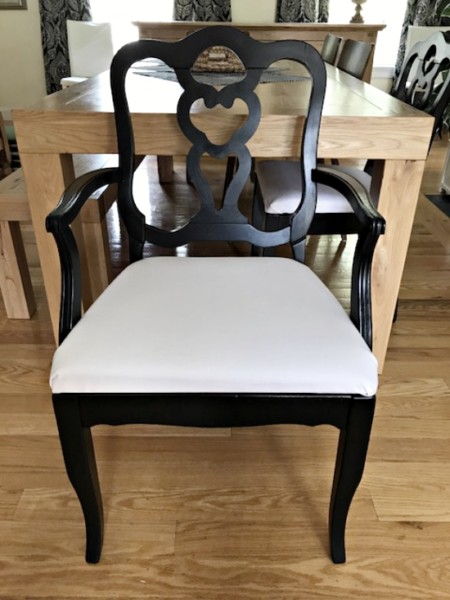
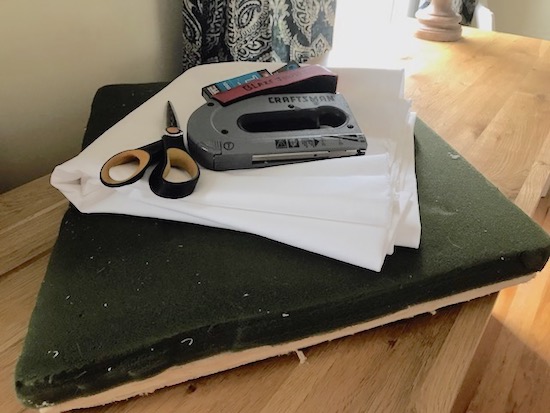
 The six chairs come with the original plywood seats and high-quality dense foam and padding. Normally, I would change out the foam, but this foam was in great condition and a very high-quality so it stayed. A Craftsman stapler is essential for the job.
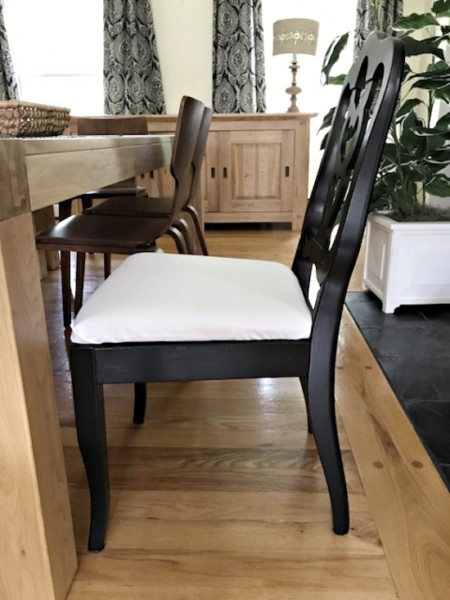
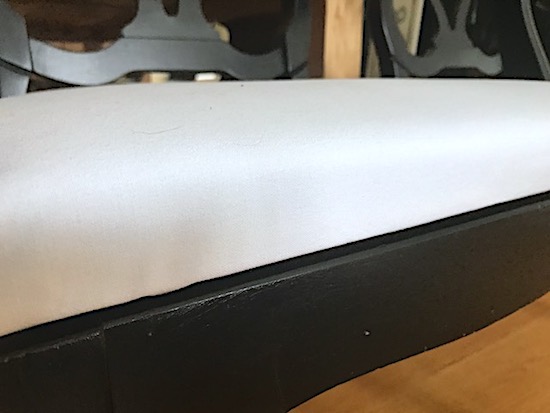
Two of the chairs were covered in white fabric for these photos and the others were left for the new owner to add their own. Of course, if the white is preferred, I’m happy to cover the remaining chairs for them.
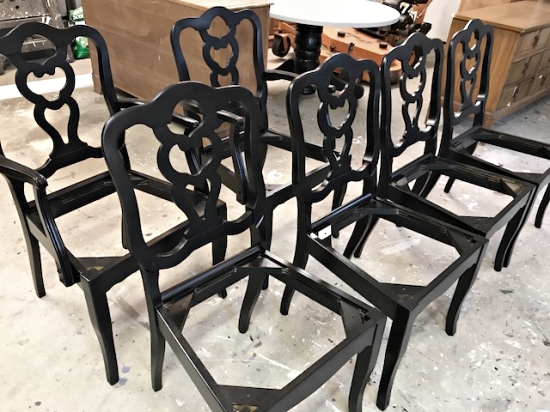
This set of six wood chairs is now for sale in the Entri Ways’ online shop.
Disclaimer: This post may contain affiliate links to products I love and use myself.


Oh wow, here I am taking chairs apart to make other things, mainly due to things I can’t fix or honestly don’t want to and you’re putting them back together and creating stunning work to get it that way. Very talented! Thank you for sharing this with us at Funtastic Friday!
You really are a master at fixing things up Vicki. The chairs looks incredible and they way you explained how to fix the back is just brilliant. So easy to understand
Thank you Michelle. I’ve discarded so many chairs in the past, until I finally decided to ask a craftman how it’s done. I couldn’t believe how easy (time-consuming and labor intensive but easy) it actually was. 🙂