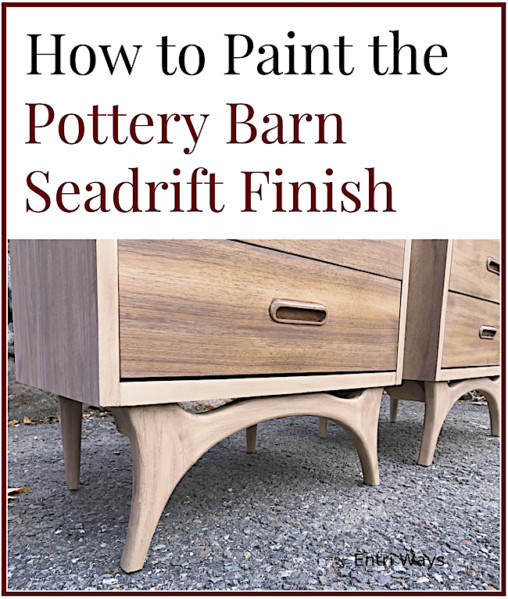
Do you love the Seadrift finish Pottery Barn created for their Sausalito furniture collection? But is the price of their beautiful finish not quite within your budget? Well, today I’m going to show you how to re-create that warm, natural wood tone of the Seadrift finish using paint.
My parents have been picking out new paint colors for the bedroom walls. In doing so, we spent lots of time staring at the walls as well as the furniture to choose a new color scheme that blended the newer pieces of furniture they really liked while still bringing them into a newer modern color scheme.
My Mom used a photo of a bedroom from the Pottery Barn catalog as her inspiration. The photo featured a headboard, dressers, and side tables in natural wood tones accented with a white and forest green blankets. Hmmm… doesn’t that color scheme sound familiar! It’s one I’ve been using in my own home.
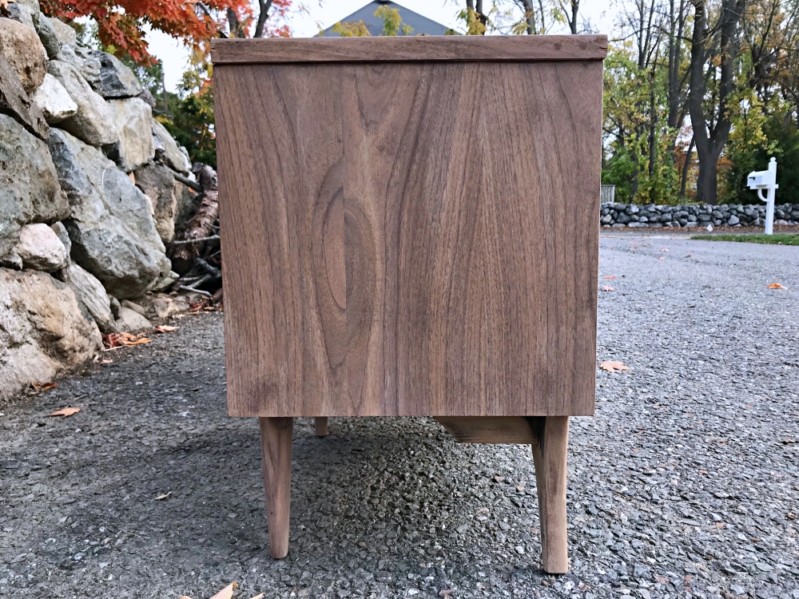
To get close to that photo, we looked around their bedroom and took it piece by piece. The color of their dark walnut 1960’s end tables needed to be updated.
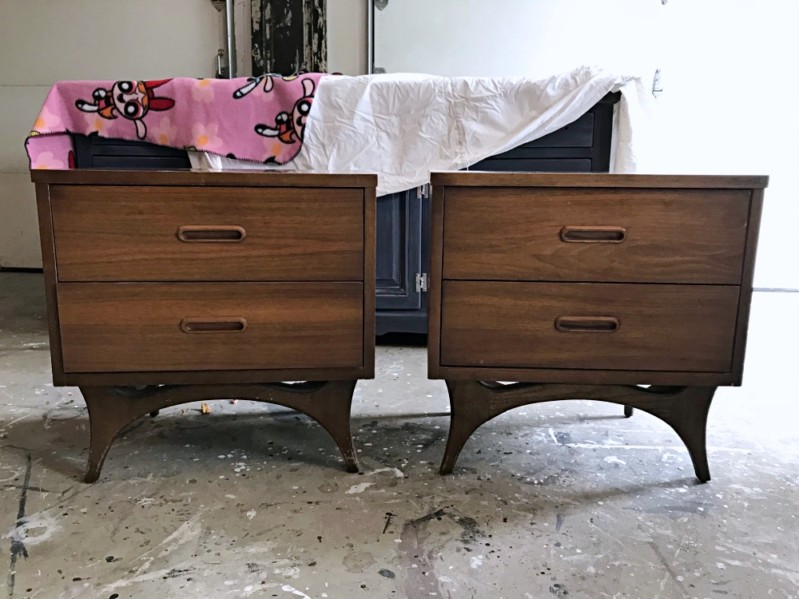
The Seadrift finish from Pottery Barn’s Sausalito collection really got my Mom’s eye. She really liked the lighter color of the natural wood. My Dad also likes wood furniture so the goal was to achieve this lighter wood color on their dark walnut end tables.

I was pretty sure the parts of end tables were wood veneer and parts were laminate so I thought I would have to paint the entire table with layers of colors to get to the likeness of the Seadrift finish.
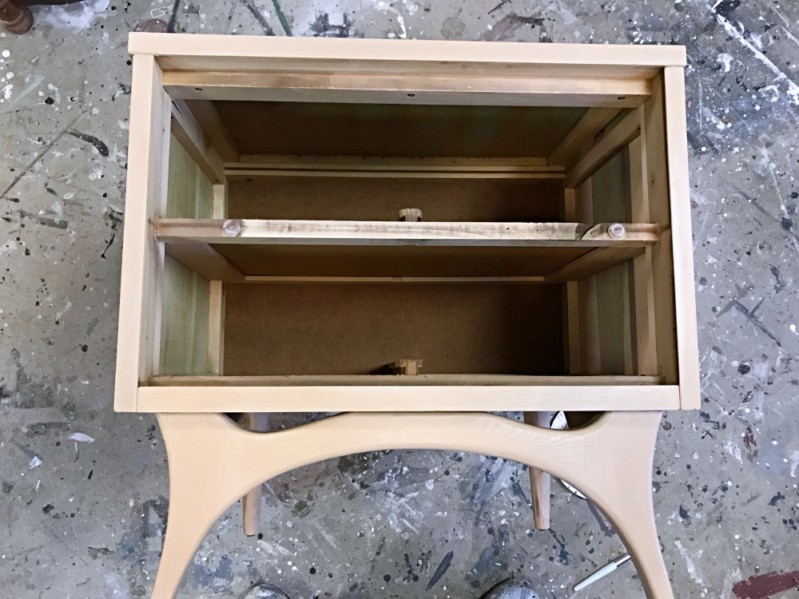
After lightly sanding with the Craftsman rotary sander, I found 5 different materials on each table…

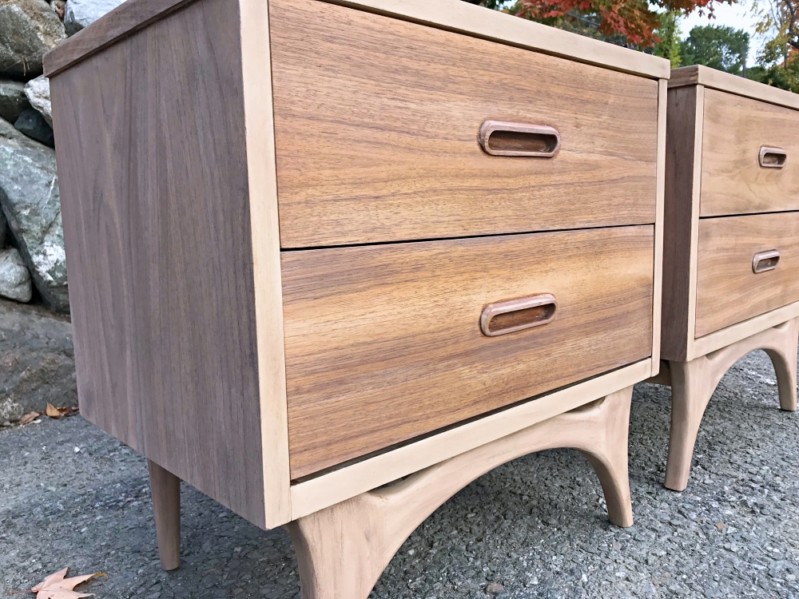
When I showed them the sanded back wood drawers and sides of the dresser, they said they really liked the natural wood and preferred I leave the drawers and sides as is. But seeing how I was now dealing with solid wood drawers and sides, wood veneer trim, dark laminate top, and legs made of a whiter wood, I knew I would have to experiment and blend paints to make all of these other pieces look like natural wood.
I think I they turned out pretty well…

Using Paint to Re-Create a Pottery Barn Seadrift Finish
Let me show you how I painted the wood veneer and legs using 3 Benjamin Moore colors and a darker brown chocolate brown.
Supplies List
- Craftsman rotary sander
- Sanding discs
- Enamel Paints: Palm Dessert Tan, Saddle Tan, and Autumn Leaf
- Folk Art Paint: Coffee Bean (dark chocolate brown)
- Cotton rags
- Water
- Clear-Coat: Benjamin Moore water-based poly flat or Minwax Polycrylic Matte
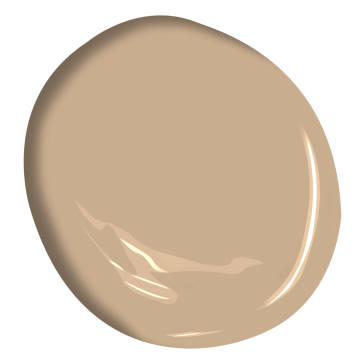
Palm Dessert Tan 1123 
Saddle Tan 1124 
Autumn Leaf 1131
Step 1: Palm Dessert Tan
The drawer front was made of different shades of tan. The lightest shade resembled the color Palm Dessert Tan. Using a Benjamin Moore Acrylic Enamel paint, I wiped 2 to 3 coats of this lightest color onto the front facing veneer trim and the legs.
I placed a small amount of paint in a plastic cup, watered it down by 10% and wiped the paint on with a clean cotton rag. I often apply paint with cotton rags because it allows me to apply very thin coats of paint and wipe off the excess at the same time – resulting in a smooth finish.
Step 2: Saddle Tan
The first coat (shown above) looked too flat and too light. Next, I used the same technique and wiped one coat of Saddle Tan, being careful to not cover the first coat completely. Remember, you want the different shades to show through.
Step 3: Coffee Bean
At this point, it was time to add some imitation wood grain. The only dark brown I had in stock was some acrylic Folk Art craft paint. The color is Coffee Bean 321. When I looked up the color online to grab the color swatch, the Coffee Bean color had a different number attached to it and it seemed much lighter than the dark chocolate brown I was using. So choose a brown that looks like melted milk chocolate. I only used about 1/2 teaspoon of this paint so the small craft paint bottle was fine.
Poor a tiny amount onto a paper plate. Tap just the very end of your brush into the paint. Then dab off most of the paint. Once you have almost no brown paint on your brush, very, very lightly sweep the brush across the furniture. Move in the direction you would naturally find the wood grain to go. Brush sporadically – a little here and a little there. If you accidentally add too much in one area, don’t worry, the next layer of tan paint will blend it.

Step 3: Autumn Leaf
The drawer fronts and sides have some deeper orange tones to them, so while I didn’t want the final finish to look orange, I did need to be sure the paint blended with the wood that I was leaving natural.
Using the same technique as in Step 1, wipe on the color Autumn Leaf. This final coat will be translucent enough that the dark brown will show through, but look faded – just like natural wood.
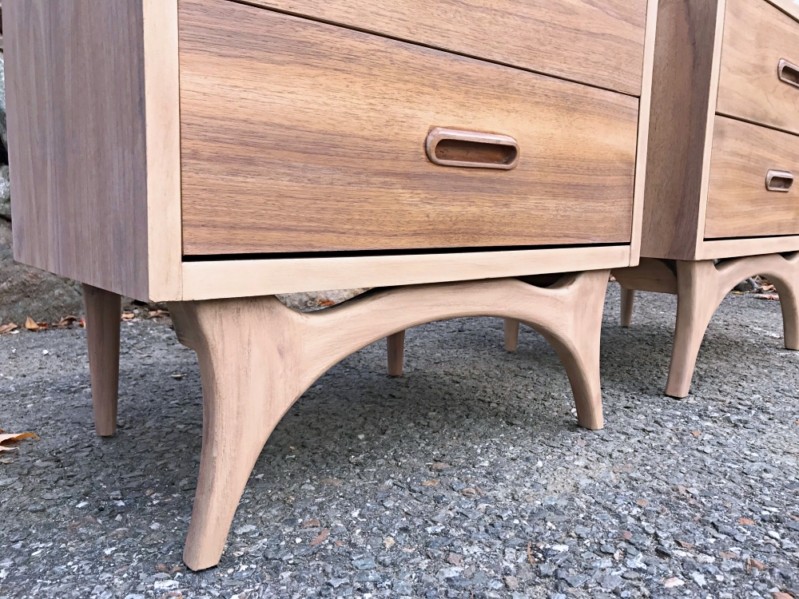
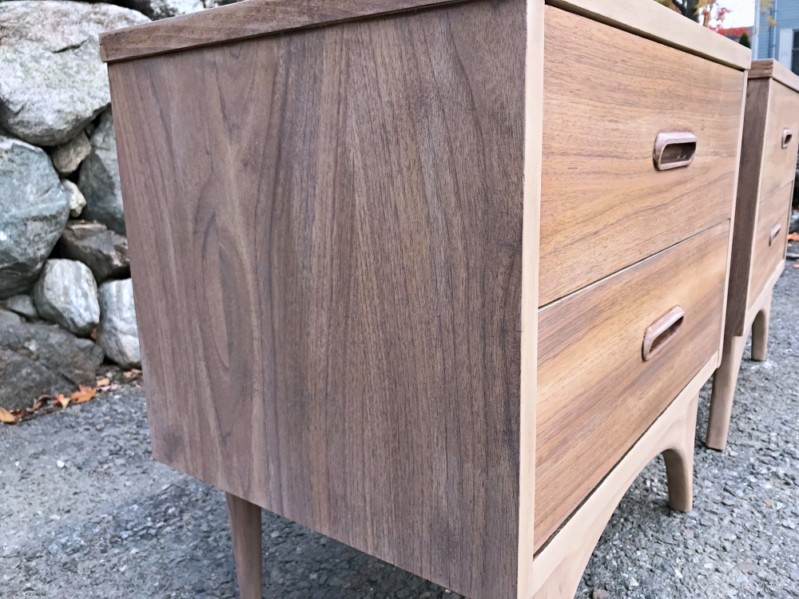
You can see how well the painted fronts (the trim and legs) blend with the sides that were left completely natural. And while the natural drawer fronts are darker than the natural sides and the painted areas, the color tones are similar.
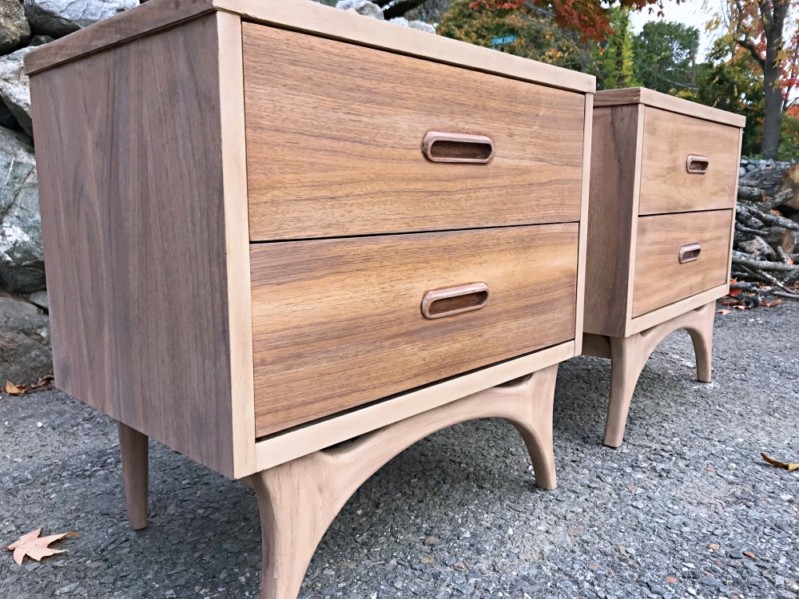
Now let’s take a closer look at how the painted legs look like natural wood…
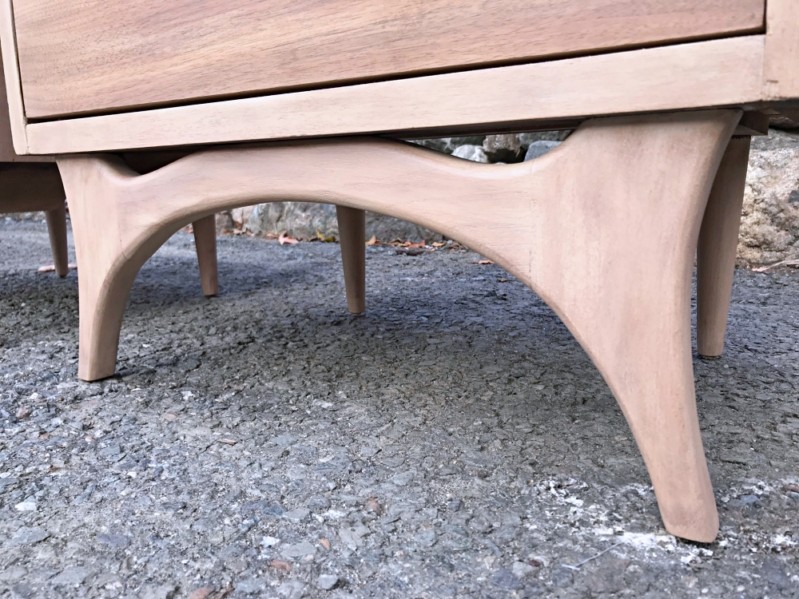
As you look at these photos, remember the drawer fronts and sides were left as the natural wood. I only sanded them back then brushed on a clear water-based polyurethane in a flat sheen to protect the wood.

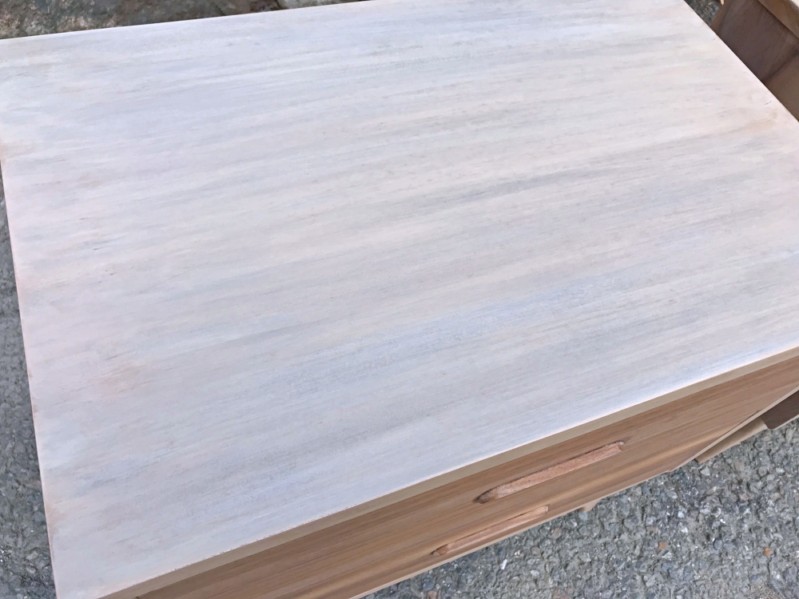
I also used the same paint on the laminate on the tops of the tables. Laminate is a plastic material so I roughed up the surface with the sander and wiped on the layers of paint. Since I was using the Benjamin Moore enamel paint in thin coat, it adhered fine.
Here’s a photo of the top, although it looks much lighter in the outdoor photo with the light reflecting off it. The top actually blended well with the rest of the table.

Disclosure: This post contains affiliate links to products I use myself.


Leave a Reply