Curtains and valances can be expensive. And if your house is anything like ours with tons of windows, then you may need to get creative when decorating those windows in order to not put yourself in debt. Today, I’m sharing a budget decorating tip for curtains and valances without skimping on the fabrics you love.
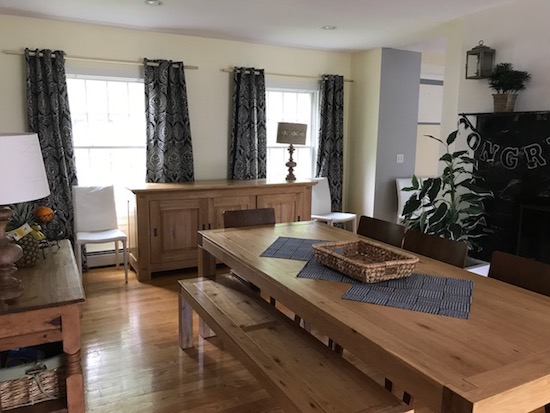
More than a year ago, I purchased new curtains from Pier 1 for our dining room. The red curtains we had in there had been hanging for 15 years. I washed them so many times over the years, they were faded and a little shrunk. It was time for a change.
I searched fabric stores, but the fabrics I really liked were far too cost prohibitive at nearly $35+ per yards. Each panel would cost over a hundred dollars!
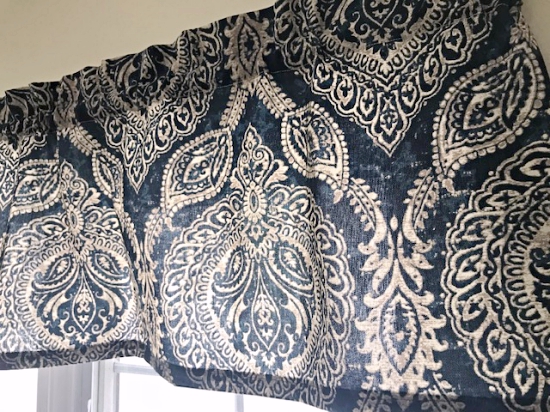
After a long search and a week before a graduation party we were hosting at the house, I found some navy blue curtains on sale at Pier 1 that I really liked. They almost looked like a denim and coordinated really well with the denim fabric I used to recover our counter stools.
There was just enough time to hang them, but not enough time pre-wash and hem them.
TIP: Always pre-wash curtains before you hem them in case the fabric shrinks.
So instead, I secured the hem with common pins and there they hung for more than a year.
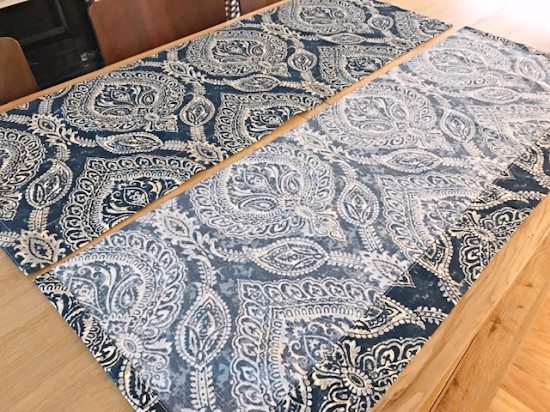
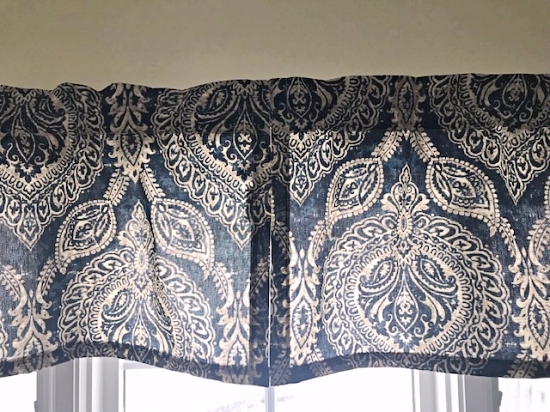
At the time, I purposely purchased those curtains in a 108″ length – much longer than I actually needed. The plan was to cut 18 inches off the bottom of each curtain panel, hem them and have enough fabric left over to make valances for the other side of the room.
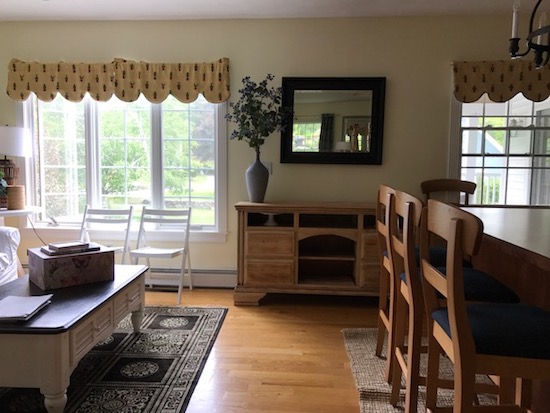
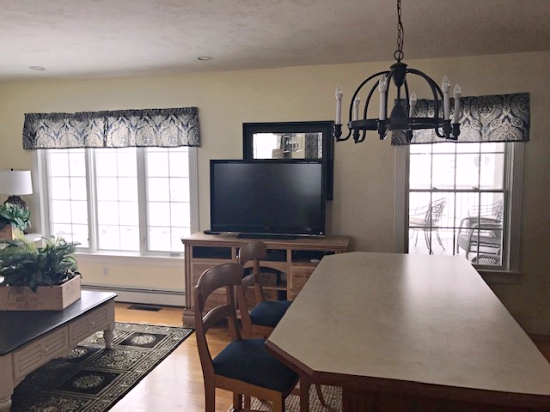
These yellow valances have also been hanging for the past 15 years and have been washed so many times the colors started to run. It was time to replace them.
So last weekend, I washed the four curtain panels, hemmed them, and began making new valances.
I was able to cut 18 inches from the bottom of each curtain panel. Each piece was already hemmed on each short end and had a 3-inch hem on the long length. I used this existing 3-inch hem for the rod pocket.
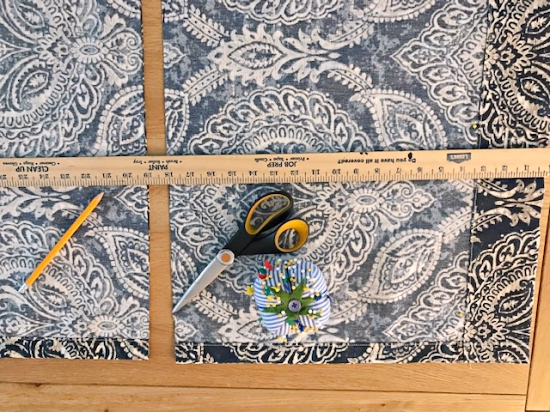
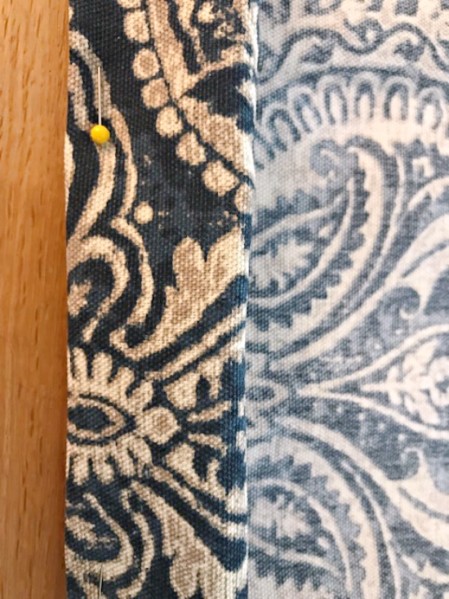
I simply cut the threads on the existing 3-inch hem to open up each end. Then measured 1-1/2 inches down and sewed a thread line straight across. What this did was create a 1-1/2 inch rod pocket but left 1-1/2 inches that would stick up above the rod too.
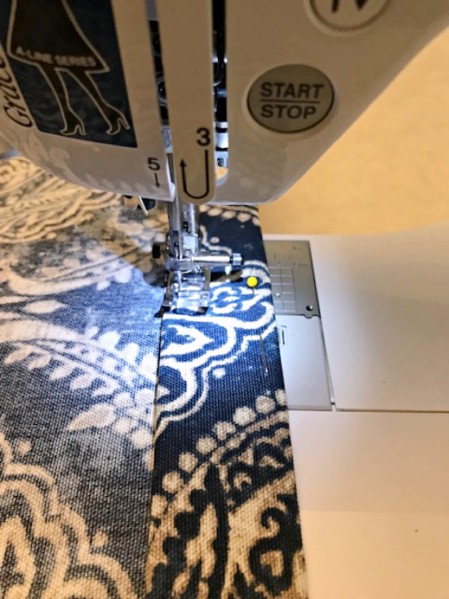
Then I moved on to the opposite raw edge and created the bottom hem. Simply fold the fabric over 1/4 to 1/2 inch, then fold it over another 1-2 inch depending on how long you want the finished valance to be. I wasn’t picky. I knew I just wanted the finished valance to fall somewhere between 14-16 inches.
Sew to secure the folded hem.
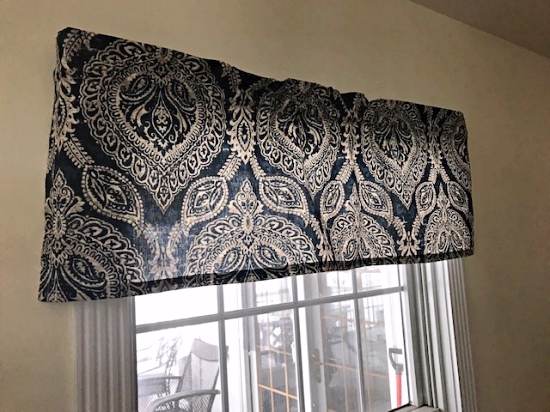
The result were window valances basically created for free. Remember, valances made with high quality fabrics cost an average of $50. Three valances at $50 each is a savings of $150.

Here are a few
Disclosure: This post contains affiliate links.

Leave a Reply