The internet is filled with IKEA hacks. Most of them are pretty impressive. Taking an inexpensive, no-frills piece of furniture and adding color and new hardware can be a great option if you’re not quite ready to invest in solid wood furniture that’s ready to last 20+ years. It would be nice though if your IKEA renovation lasted more than just a few years. That’s why today we’re talking about painting an IKEA table with a durable finish that lasts.
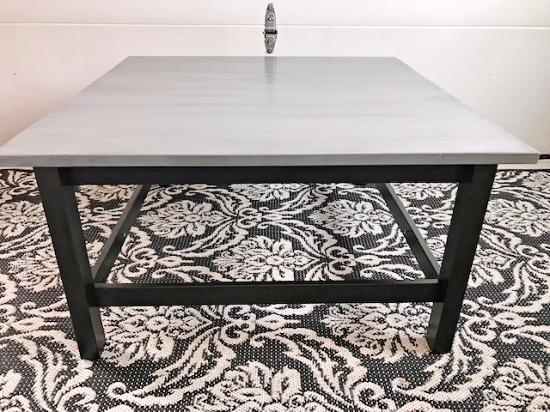
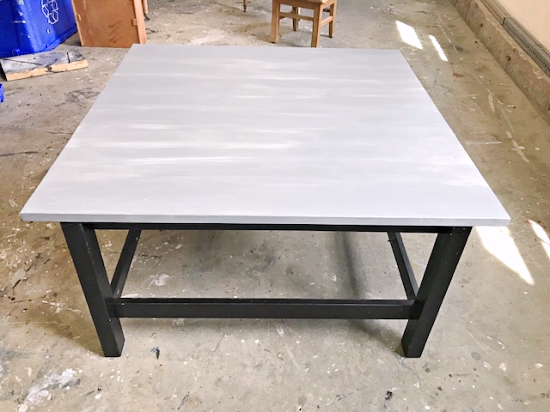
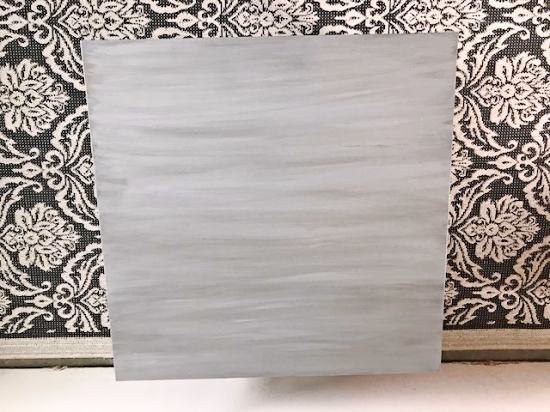
A few IKEA tables and dressers and have entered my workshop over the past five years. If you’ve been following along for a while, you may remember this faux concrete IKEA Lack table. If you look closely you can see the varying shades of gray, just like real concrete.
To create the look, I primed the table then sprayed on a few different color silver metal and matte black spray paints, then sealed it with water-based poly. While I love the finished look, the finish really wasn’t very durable. Even with the primer base coat, the table scratched pretty easily because, quite honestly, most paints don’t adhere well to these IKEA tables. I don’t think the buyer had kids, because even after cautioning them that it could scratch easily, they were still thrilled to buy the table.
The reason why paint rarely adheres well to IKEA tables is because these Lack tables, like many IKEA furniture pieces, are not made of real wood. They are made of MDF (imitation) wood that’s covered in a plastic veneer. That’s why you should never try to sand an IKEA table. The surface will just scratch.
Throughout the years, I’ve experimented with spray paints, chalk paints, milk paints, and latex and think I’ve finally come up the best paint and topcoat for a durable painted IKEA table.
Benjamin Moore DTM enamel. Unlike latex, chalk and milk paint, DTM enamel paint adheres to almost every surface on which I’ve ever painted it. It seems to adhere even better than primer and it hardens better and faster than any other paint I’ve every used.
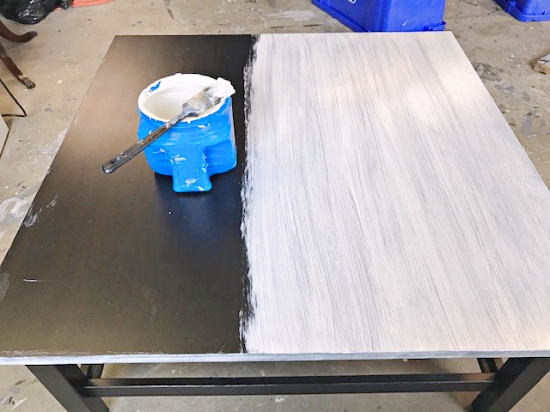
After washing the table with a TSP solution to remove any dirt and oil, I painted the tabletop in a very thin coat of the enamel paint. The color I had on hand was China White, which was a perfect base coat. Allow this base coat to dry for 24 hours.
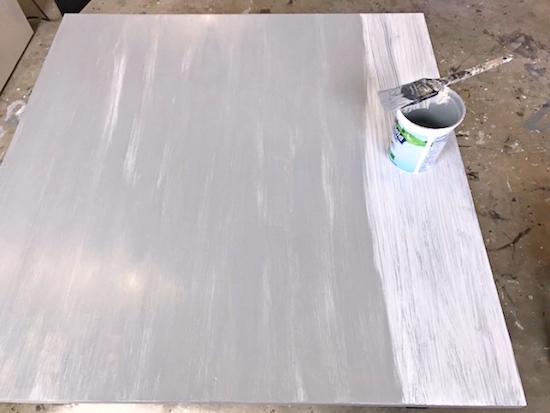
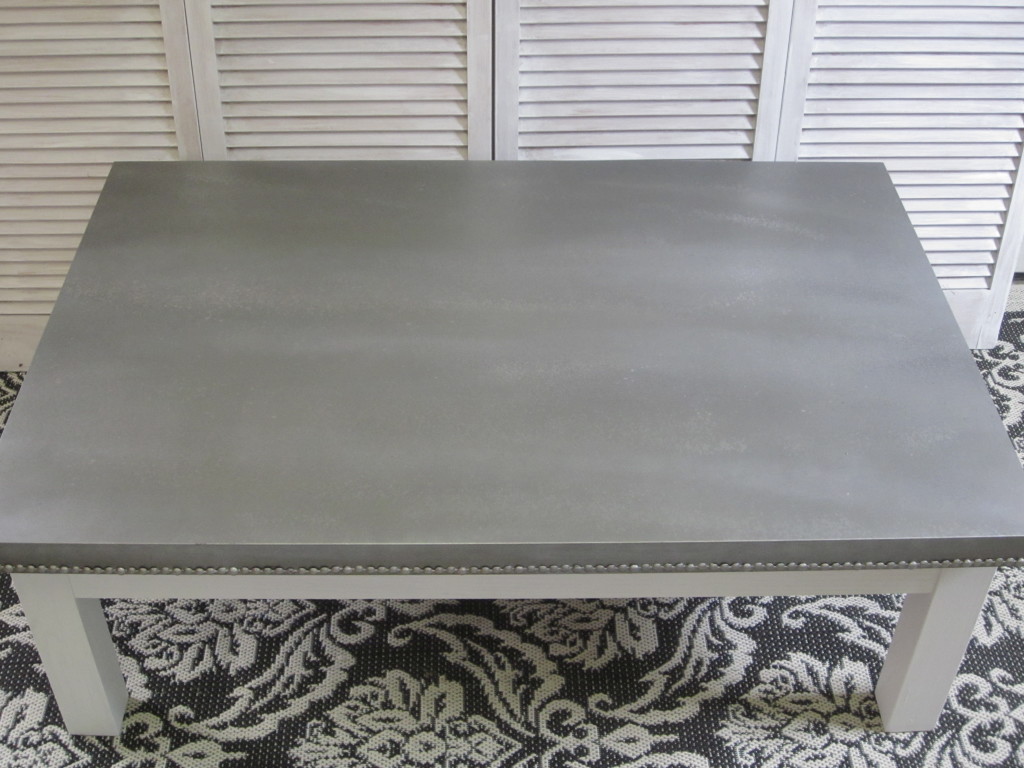
My client requested a silvery gray top. I could have gone to hardware store and purchased a quart of the exact color gray DTM, but decided to use a blue-gray DTM I had in the shop and mixed in a little of the China White DTM and Annie Sloan’s Graphite gray to create the perfect gray. I watered down this mix and painted on a very thin coat then let that dry. I get impatient. Ideally I should have let it dry at least 4 hours, but I think I painted on a second coat after about 2 hours.
Once dry, I brushed on a coat of satin polycrylic. I use THIS one from Minwax. The polycrylic won’t discolor the finish like an oil-based poly would so be sure to use the water-based poly.
Applying the poly is really important in order to apply the black glaze in the next step. The poly creates a slick surface so you can more easily control how much glaze stays on the table.
Once the poly is dry (which only takes 1-2 hours), brush on the black glaze. I use THIS one from General Finishes. You don’t need to brush on full-coverage like with the paint and you need to work quickly and in small areas. Brush on a section of the glaze and immediately wipe it off with a clean cotton rag. A t-shirt cut into sections works perfectly. Wipe off as much glaze as you want. If you need to wipe off more, add some water to your rag.
When I was finished applying the glaze, I think I had an uneven finish. No problem, I used a rag to wipe on a little more of the watered-down gray paint over the entire table, then added another coat of glaze. Eventually I achieved the subtle washed finished my client requested.
When I paint these multi-layer washed finishes, I water down the top layers of paint and use both brushes and rags to apply. Like an artist layering paints on a canvas.

The final two coats were a clear water-based poly, but for topcoats on tables, I now always use Benjamin Moore’s Stays Clear water-based poly. It’s the same product intended for use on wood floors so it’s super durable.
If this DTM base coat combined with Benjamin Moore Stays Clear topcoat doesn’t adhere and protect this IKEA Lack table, then I don’t know of any product combination that will!
Disclosure: This post contains affiliate links to products I use myself. Click here to see a full list of products.


I have an ikea table that is untouched, so it doesn’t need to be painted. I’d like a thick durable coat that’s clear over it.What should I use?
I haven’t tried a clearcoat directly on an Ikea table (only over paint) so I cannot guarantee the result. But if I where I would try, I would choose a water-based poly. Topcoats, including my preferred water-based polys, are explained here…https://entriways.com/painting-furniture/