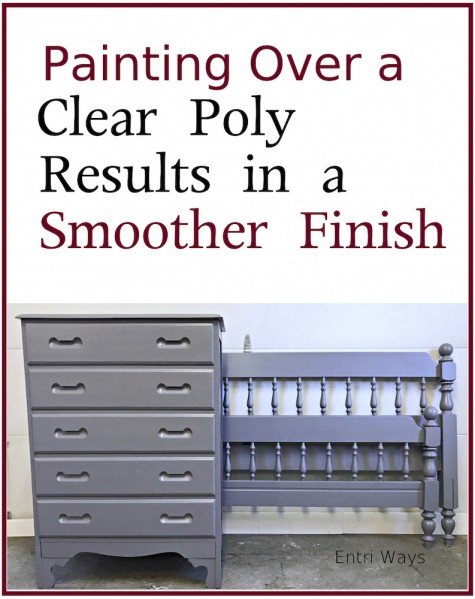
Did you know that painting over a clear poly finish can result in a smoother finish? As a furniture refinisher and painter, I’m always experimenting to improve my craft and to learn new things. It may be as simple as trying a different brush or layering different products. This week I learned that applying paint over a clear coat of poly results in a smoother finish. It was a light-bulb moment! Here are all the details as I refinished this Dior Gray dresser and bed.

In yesterday’s post, I revealed the makeover for this full-size bed. What I didn’t tell you was that the only prep done on this bed was wiping it down with a damp cloth. That’s so unlike me! For the past 4 years, I’ve sanded (almost) every piece of furniture that’s come into my workshop.

Sanding is like cleaning the furniture with a really good exfoliation. It removes any scratches, dust, glue, or anything else that may be adhered to the wood.
You would think that painting over a freshly sanded piece of wood results in a better end result, wouldn’t you?
I did too.

This particular bed had so many small spindles, the thought of trying to hand-sand the old polyurethane finish from those was putting me over the edge. Also, this bed came from a friend of mine, Dorene, so even though it was vintage, I knew it came from a clean home.
Instead of sanding, I used a Benjamin Moore enamel paint I knew stuck to everything. Or at least ever surface on which I’ve painted it – and that was a lot of surfaces!

I proceeded to paint two coats of the enamel paint directly over the polyurethane finish. The finish that resulted was super smooth!
[Keep in mind that while this bed had a polyurethane (oil-based) finished, I believe polycrylic (water-based) would have the same effect.]
I loved it so much that I started on the next dresser in my workshop (also from Dorene). The different was, since I originally planned to stain this solid wood dresser, I had already sanded it down to the bare wood.

After two coats of the Dior Gray enamel paint on the dresser – which, by the way, also came out beautiful – do you know what I realized? The bed frame had a smoother finish. The bed frame felt like I applied a clear topcoat over the paint.

I was actually shocked! How could the same paint feel differently on two different pieces of furniture?
Well, it did. And it was all due to the undercoat.
Please know that the finish on the dresser was still very smooth and was beautiful. Any other day, I would have been confident and happy sending this dresser out the door with a customer. It’s just that when comparing the dresser side-by-side to the bed frame, I could feel the difference in the smoothness.
This is the part that comes only with trial and error and experience.

You might be asking… won’t the paint on the bed frame chip off more easily? I don’t think it will.
You see… this enamel paint is made to adhere directly to metal. I’ve used it on doors that are opened and closed 50 times a day, on outdoor furniture that’s exposed to the elements all winter (New England winter) long, and on desks and other tabletop surfaces. I’m confident it will adhere to this bed for many years!
You also might be thinking… everyone knows you’ve never had to sand before using Chalk paint, so why not just use that?
I could go into the thousand reasons why I rarely use Chalk paint anymore. The biggest reasons being that it does NOT adhere well, it chips off super easy, and it results in a super dry (matte), rough feeling finish so you have to apply a clear coat over it for every the slightest sheen. Chalk paint has it’s uses, I just don’t prefer it for the majority of my refinishing projects.

This dresser will get a clear polycrylic topcoat before it’s sold to one of my customers. Not because it needs it for the look or durability, but just because I’d like the finish to match the bed frame exactly in both look and feel.
With this new knowledge, will I continue to sand furniture pieces prior to painting them?
Yes, in many cases I will, to clean them and remove scratches and dirt. But maybe not to the extent that I have been sanding them down – which was to the bare wood in every crevice.

Every piece is different. And it’s from this experimenting and experience that I can more easily make the decision of to sand or not to sand with every unique piece of furniture that comes into my workshop.
Disclosure: This post may contain affiliate links to products I use myself, including THESE refinishing projects from my Amazon shop.


Good afternoon. I just came across your post while researching before painting my four poster king size bed, which also has ornate posts I do not want to sand. I am keen to try this method, however the headboard was scratched when moving it and now has a small gash several feet long ? Do you reckon of I use a wood filler and paint over the area with poly it would work to paint using your method without showing the deep scratch?
Hi Sarah
If the scratch is deep enough, the wood filler will go into the crevice enough and then you can sand it smooth and paint. If it’s not too deep, you’ll notice the wood filler rubs off as soon as you try to wipe it on.
I don’t recommend you add a FRESH coat of oil-based poly before you paint. Whatever clearcoat is on your bed now has had several years to dry, cure, and even wear away some. You could either paint over the wood filler or add a water-based clear to smooth the surface then paint, but it’s probably not necessary.
I just painted my bathroom cabinet and very lightly sanded before I painted to add a little tooth. Depending on how shiney your bed is, you may consider doing this:
May I piggy back on this question? I have a similar situation. To be clear, if we use wood filler in that one area and then sand that area, we’d then need to sand the entire piece for a consistent finish, right? I’m quite new to painting so I’d appreciate your opinion. Thank you!
You could sand the entire area but it depends how large the scratch is. In general a few coats of the semi-gloss enamel paint should have enough of a sheen to blend the entire area. If you’d like to be safe, you could try applying the water-based clear and then paint.
Those pieces are beautiful. I have a couple of pieces that need new life , and am researching. Were these done with a sprayer or brushes and rollers? What brands did you use?
Thank you,
Janice
Thank you Janice. I always use this super trim Purdy brush: https://amzn.to/45XHm1h. And I can manipulate the paint to result in a finish as smooth as any sprayer. The type of paint I use depends on the project but it’s most often BM. Find more details about the paints I use for each project here: https://entriways.com/painting-furniture/