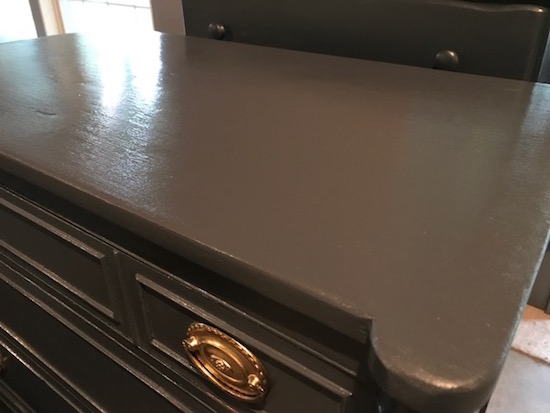
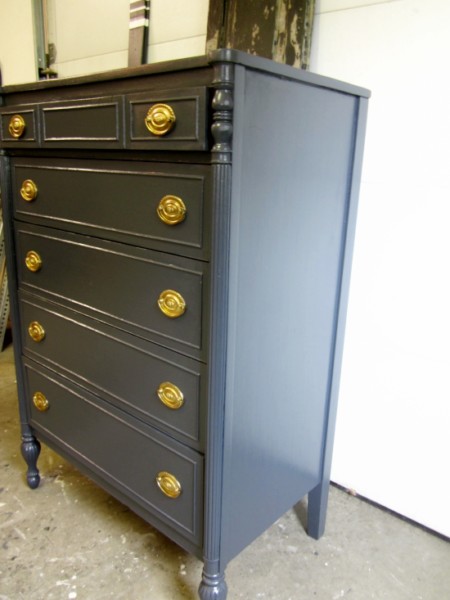
Today’s furniture makeover took several hours of repair work, but it was so worth it. There was peeling veneer and swollen drawers, but several days of elbow grease and a little hockey stick wax took care of both. Yes, hockey stick wax. I explain how later in this post. Now, this antique dresser with Hepplewhite drawer pulls is absolutely beautiful dressed in dark navy blue.

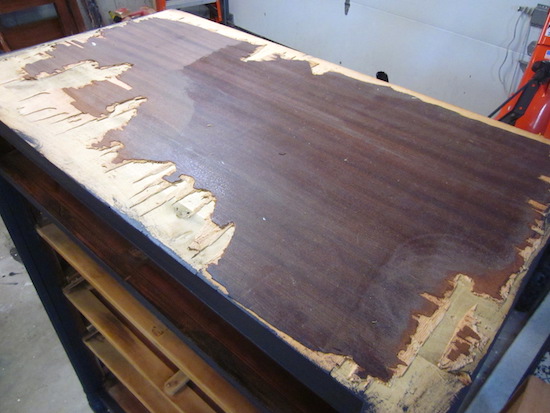
At first look, the dresser looked as though it simply needed a refresh of the brown, stained finish. If you look really closely though, you’d be able to see there was quite a bit of chipped veneer on the drawer fronts and the veneer on the sides and top was a complete disaster.

Removing Wood Veneer
Here’s the top after I lifted the loose pieces. It was the two layers of veneer on the top that became the real labor-intensive part of this project.
In the past, I’ve just left similar dressers out in the rain and sun for a few days. Of course, you can only do this with a solid wood dresser, but getting the veneer wet, then drying it out in the hot sun loosens the glue and makes lifting the veneer with a chisel fairly easy work.
The problem this time around was that while we had plenty of rain, the weather stayed cool so the sun wouldn’t have warmed up the glue enough. I’ve read that you can use a heat gun to melt the glue, but it’s not something I have so I usually rely on the hot sun.
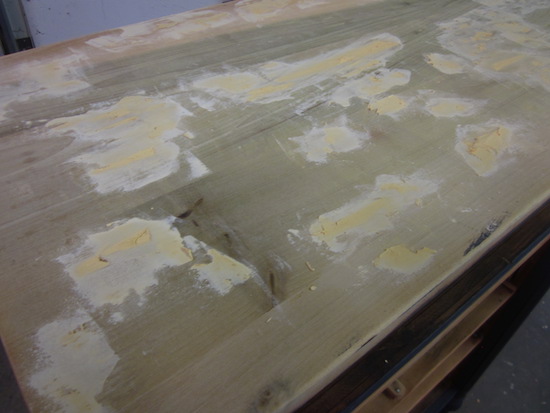
So, instead of relying on the weather, my son and I worked at the veneer piece by piece with hammers and chisels to remove the two layers of veneer in the garage. If you do this, remember to wear safety glasses. There were wood pieces flying everywhere!
We removed a little of the veneer along the edges, then let it dry in the garage overnight so the new edges would lift, chipped off a little more, let it dry overnight, etc., etc. It took at least a week to remove every piece of veneer.
Then phase two began.
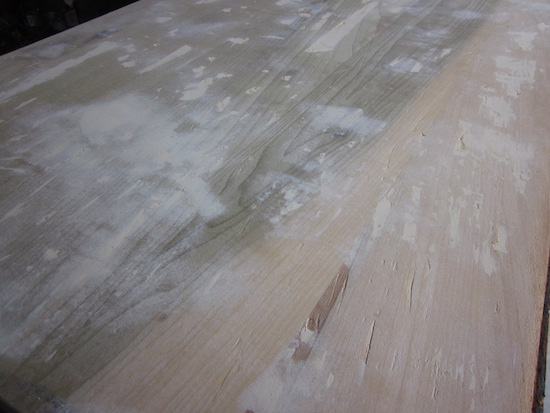
Smoothing a Wood Surface
The top was sanded down with my DeWalt rotary sander and any divots left in the wood from the chisels were filled with wood filler.
Allow the wood filler dry overnight then sand it again. Repeat the process on any areas where the wood filler sunk in when it dried.
After the second coat of wood filler dried and was sanded back, I primed the dresser. (Tip: The primer allows you see any remaining divots in the wood better.) Then I repeated the wood filler process again.
So that process was:
Apply wood filler… let dry overnight… sand.
Repeat.
Prime.
Apply wood filler… let dry overnight… sand.
Repeat if necessary.
Paint.
While the top is not 100% perfect, it’s pretty close considering where it started.
The veneer on the two sides was much easier to remove. Thank goodness! It actually peeled off in strips nice and clean. I was then able to just prime and paint the sides.
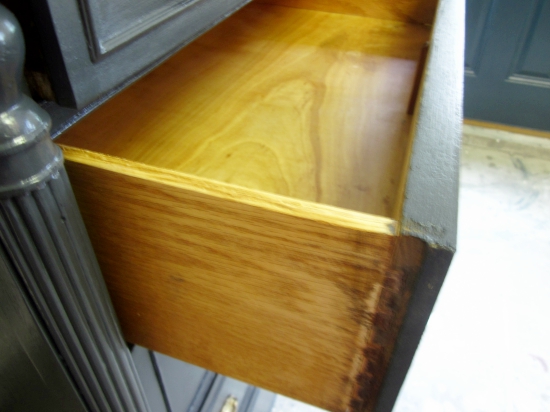
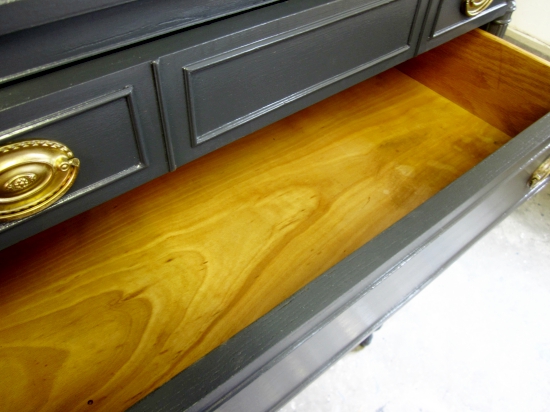
Adjusting Dresser Drawers So They Slide Smoothly
The drawers on this antique dresser were in excellent condition, but they did stick a little. Not too badly, but just enough that they weren’t sliding smoothly. Plus, when I did push the drawers closed, the top of one drawer rubbed against the bottom of the one above it. If this wasn’t fixed, over time the blue paint would just rub off.
So here’s a few solutions to re-sizing the drawers and getting them to slide smoothly.
If the drawers stick as they did in the case of this dresser, remove them, flip them over, and using an electric sander, sand the bottom edge on each side of the drawer.
If the drawers close too tightly because they’re rubbing against one another along the top or bottom edges, then remove the drawers, flip them over, and sand down the bottom edge of the drawer front with an electric sander.
Once the drawer boxes fit perfectly inside the dresser, here’s one more trick I use to help them slide smoothly…
Rub hockey stick wax along the bottom edges of the drawer box and along the wood glides. Yup! Hockey stick wax. The solution of a hockey Mom.
Hockey wax isn’t like the soft wax you buff on as a topcoat over paint. It’s hard and looks like a clear block – like a hockey puck. I imagine imagine the surf board and ski wax is the same.

With the repairs made, this solid wood dresser is sure to last many, many more years.

This tall, antique, navy blue dresser is now for sale in the Entri Ways’ shop.
If you’d like to furnish your home for pennies, click the image below.
You’ll receive FREE, immediate access to my newest ebook:

I even reveal how I make my biggest profits flipping furniture!
If you live in the Boston area and have solid wood furniture pieces that need an update, let’s talk about how paint or stain could transform them. See this info on my custom furniture painting & staining services…

Disclaimer: This post may contain affiliate links to products I love and use myself.


Such a handsome dresser! And thanks so much for the wax tip. Fyi, a bar of soap works the same way … plus your drawers smell nice ! LOL Thanks for sharing, Cynthia
Oh! Love the bar of soap idea! Thank you
A marvelous makeover! Those tough veneer projects are always the most satisfying because of the huge reward in the results! Never would have thought of using hockey stick wax, but I’m a southerner, I’ll have to give surfboard wax a look into! Thanks for sharing your great tutorial at #FridaysFurnitureFix!