You decide to paint a room and things snowball. All of a sudden the lighting needs updating, the area rugs don’t match, the accessories are a different style, and your wall art looks out of place. Where does it end? You just wanted a new color on the walls. Well, my friend, I’m here to save your pretty pennies on wall art and show you how you can change your wall art… without ever changing your wall art.
Sounds like a Scooby Doo mystery doesn’t it?
But these are actually really 3 simple solutions to making your wall art coordinate with your new wall color.

.
3 Ways to Update Your Wall Art
When we went from yellow walls to white walls in our kitchen/dining room, the rooster prints in our kitchen looked out of place. Their yellow color looked fine against the yellow wall, but against the white wall, they looked dingy and dated.

My kids wanted me to replace them entirely, but I still kind of liked the roosters and wasn’t ready to give up on them entirely. Or, at least not until I replace the curtain valences in this area.
Finding artwork I love is a challenge and I won’t just buy something to fill a space. So I decided that I had to find a way to make the roosters work. Which takes us to the first way to update your artwork…
1. Change the Color of Your Wall Art

For this artwork update, I opted to tone down the the yellow on the rooster print by adding a wash of the white paint over the yellow.
To do this, place a small amount of the white wall paint in a plastic container. Add a small amount of water to the paint to thin it out. Wearing gloves, dip the corner of a cotton rag into the paint and rub it onto the print in a circular motion, spreading the paint as you go.
The idea is to put a white color wash over the yellow to tone it down, but not so much paint that will cover up the grass or writing you see on the print. I worked around the rooster and did not put any paint over the rooster since I wanted the deep blue-gray feathers to stand out in contrast to the white paint.

The result was refreshed rooster print that now blended with the white walls rather than a yellow that looked dated against them.
.
2. Re-Paint Your Wall Art
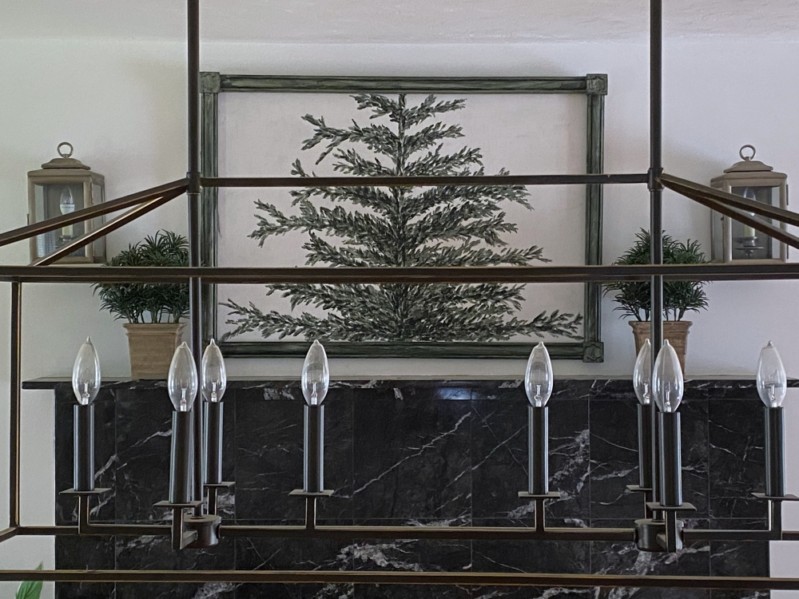
About two years ago, I decided I was tired of the picture we had hanging over the dining room fireplace. The style wasn’t right for the space any more. So I grabbed an old frame and quickly painted a pine tree to fill the space.
At the time, this pine tree painting was a place-holder until I found something I liked.
This piece of art irked me ever since I hung it two years ago. Honestly I completely messed up painting it. The branches stuck straight out and the middle branches were longer than the ones below it.
But, I liked the deep forest green frame and the idea of single pine tree.

I really wanted this print to look more like this one in the photo below. This was the first pine tree I had ever painted and I love the way it turned out.

So instead of buying a new piece of art, I got out my brush and the forest green paint, re-shaped the branches and added new ones. Much better now…
.
3. Rotate Your Wall Art
The third way you can change your wall art without ever changing your wall art, is to move it to a new wall. In my house, artwork and mirrors rarely stay in the same location for more than a few years. Some I even move around the house every few months.
Mirrors swap positions with chalkboards. The cow print we had hanging over our fireplace, moved to the hallway for a while.
Play musical chairs with your artwork. You may just find that you like them better on a different wall or in a different room.

So if you’re ready to paint your walls a new color, don’t get caught in a total spiral feeling like you have to spend all kinds of money changing out every piece of artwork all at once. Re-invent what you have. At least until you find another that you absolutely love.
.
Shop Our House
Disclosure: This post contains affiliate links.




Leave a Reply