Last week I showed you how to transform a solid oak wood table into a modern whitewashed table. The old finished was completely sanded off and layers of stain and paint were layered to create a washed wood appearance. The fact that that table was solid wood had much to do with the products I was able to use on it. But how do you refinish a table that is not real wood?
.
How to Refinish a Table That’s Not Real Wood
.
Step 1: Determine if the Table is Real Wood
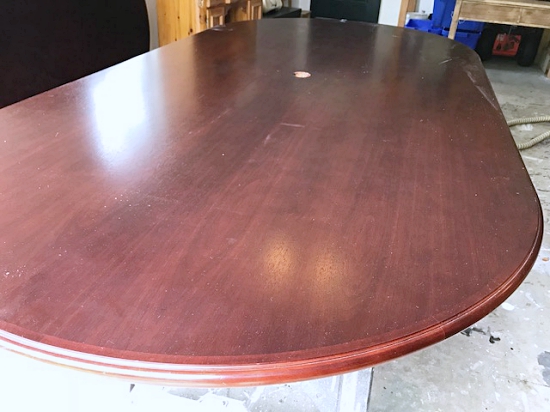
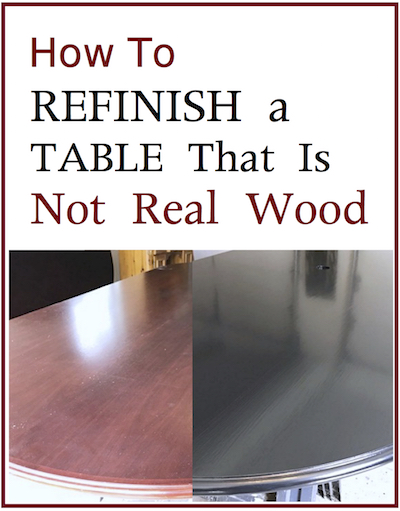
At first look, the office conference table pictured above appears to be real wood. There’s wood grain on the top and knicks along the edges. Looking at the top, it’s very difficult to determine if the table is real wood.
This table had a center hole for conference phone cord. Looking at the cut edge of the hole, it was easy to see that the tabletop was not real wood. It looks as though ground up wood was packed back together, creating layers. Wood would be much more dense and solid than this.
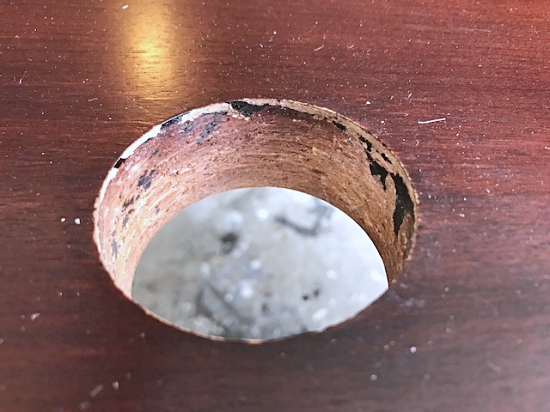
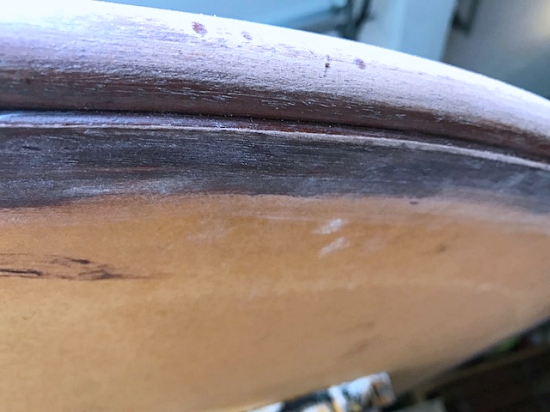
Then look at the table from underneath. As you can see this table is made of MDF (manufactured) wood.
.
Step 2: Sand Very Carefully
The tabletop most likely had a wood veneer or laminate made to look like wood on top. If I were to sand this table with my Dewalt rotary sander or hand-sand it with a course sandpaper, it would create rough grooves in the tabletop that would show through any stain or paint.
Instead, use a very fine 220-grit sandpaper and lightly hand-sand the table top in the direction of the wood grain. It’s very important that you use a light touch and sand in very straight lines following the wood grain.
When I sanded the edge of the table, I realized that just the trim along the table’s edge was actually real wood; so I was able to sand this area down to the bare wood.

.
Step 3: Wash
Remove any sanding dust with a tack cloth or damp cotton cloth. Then wash the table with a degreaser like Krud Kutter or a TSP solution to remove any remaining dirt and oil.
.
Step 4: Paint
Since the table was made of an imitation wood and I was not able to remove the old finish, I opted for paint. At this point if you plan to use a basic latex, first apply a primer and let sit overnight to ensure adhesion.
My preferred paint, however is a Benjamin Moore’s enamel, specifically DTM Semi-gloss or Low Lustre. This paint adheres to almost everything. There’s also a high gloss version called Impervex.
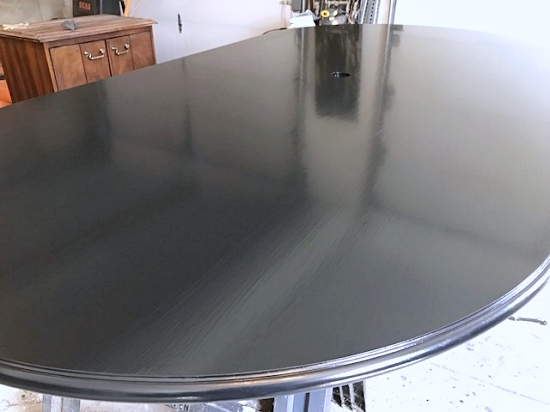
This table was part of a set of office furniture being refinished for a single client and the Low Lustre was preferred for the sideboard cabinets so I also used it on the table. The finish gives you a very light sheen similar to that you’d find on a Pottery Barn cabinet, chairs, or table base.
These photos were applied after two coats of the paint:


.
Step 5: Clear-Coat
The low lustre enamel paint is durable enough for a tabletop. However, it doesn’t wipe clean as easily as a higher gloss finish and as you rub your hand across the top, you may get a gray dust mark from your hand print. Therefore, it’s best to apply a clear-coat over the low lustre.
There are quite a few water-based polyurethanes and polycrylics to choose from as your clear-coat. Benjamin Moore’s Stays Clear is the best water-based polyurethane I’ve found. It’s actually made for wood floors so it’s very durable.
Apply the Stays Clear with a good quality natural bristle brush. Brushing on clear-coat is very different from brushing on paint. Brush it on, but do not brush it back and forth. Brush it on in a single long even stroke. Work in the direction of the wood grain from one end of the table to the other, then more on to the next section.
Tip 1: Once you go past the section you’ve brushed on, do NOT go back to it. If you find an imperfection, you must wait for it to fully dry.
Tip 2: You will need to apply a second coat, but you must allow it to dry completely between coats.
Tip 3: If after the second coat, you see spots that look like you may have missed, you’ll need to apply another coat to the entire table. If you do just a section, the touch-up will show when it dries.
This table took 4 coats to achieve a completely smooth surface. The final result is stunning…

Disclaimer: This post contains affiliate links to products I use myself.



Great tutorial on figuring out it the piece is wood or not and how to handle it.
Thank you! Sometimes it can be really difficult to tell if a piece is made of real wood.
Where did you find the Benjamin Moore’s paint? I can’t find it anywhere
At a Benjamin Moore retailer
What was the name of the paint color used?
It’s a pre-mixed black.
So very helpful!!! But I made the mistake of sanding a spot with a 120 grid and scratched the surface!! Help! What should I do?
Should I easily sand that spot with a 220 or Do I have to sand the whole table top ? :(((
Yes, try lightly sanding with a 220 grit to smooth out any scratches.
Did you brush on the enamel?
Yes, I brush on paints.
What is the color you used?
It was a pre-mixed black
This is so great thank you for sharing. Just bought my BM paint and will start my office furniture project next week!
You’re welcome. Would love to see before & after photos to share.
What if my tabletop is beaverboard. That was a limited edition, I want to keep it but it is now with few heat marks which I have no idea how to work with it.
Emily, I’m not quite sure what you’re asking. Beaverboard appears to be a form of or similar to MDF. If the surface has a veneer on top or is smooth you should be able to paint it. A primer may be necessary.