Refinishing furniture for yourself is very different from refinishing furniture for clients; but even more rewarding when you can see someone else’s vision come to life through your work. After years of refinishing furniture for my own home and to sell, I’ve decided to refinish furniture for others.
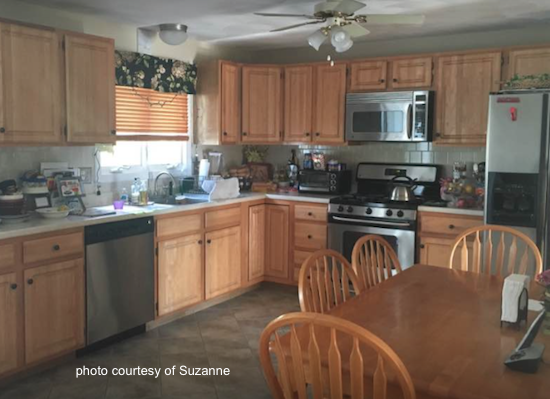
I absolutely love what I do. It’s relaxing, rewarding, and I get a chance to meet so many amazing people. Suzanne was a new client of mine. She’s from my town and knows alot of the people I know but we never knew eachother until now. The day we met, I learned that both my cousin and a close friend had helped with her kitchen update, bringing it from stained oak to bright whites and light grays.
Suzanne was now ready to refinish her furniture to coordinate with her new lighter and brighter white cabinets and gray countertops.
That’s where I came in.
I’ve always thought of furniture as a blank canvas. Sand. Evaluate. Paint or stain. Evaluate. Paint or stain a little more. Evaluate. Basically, reading the furniture and how it accepts the paint or stain as I go. Whatever comes off the tip of my brush is the end result.
Refinishing for clients is very different. Sometimes you’re working with someone else’s beginning vision and trying to make the furniture adapt to that vision. Sometimes there’s no clear vision they just want something different.
Either way, it’s a process.
I’ve never considered myself a perfectionist, but when working with someone else’s furniture versus a free piece I picked up off the curb, I always take extra care to deliver furniture that’s as close to the client’s ideal vision as possible.
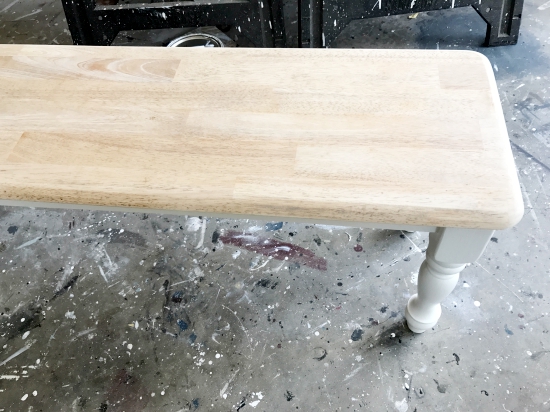
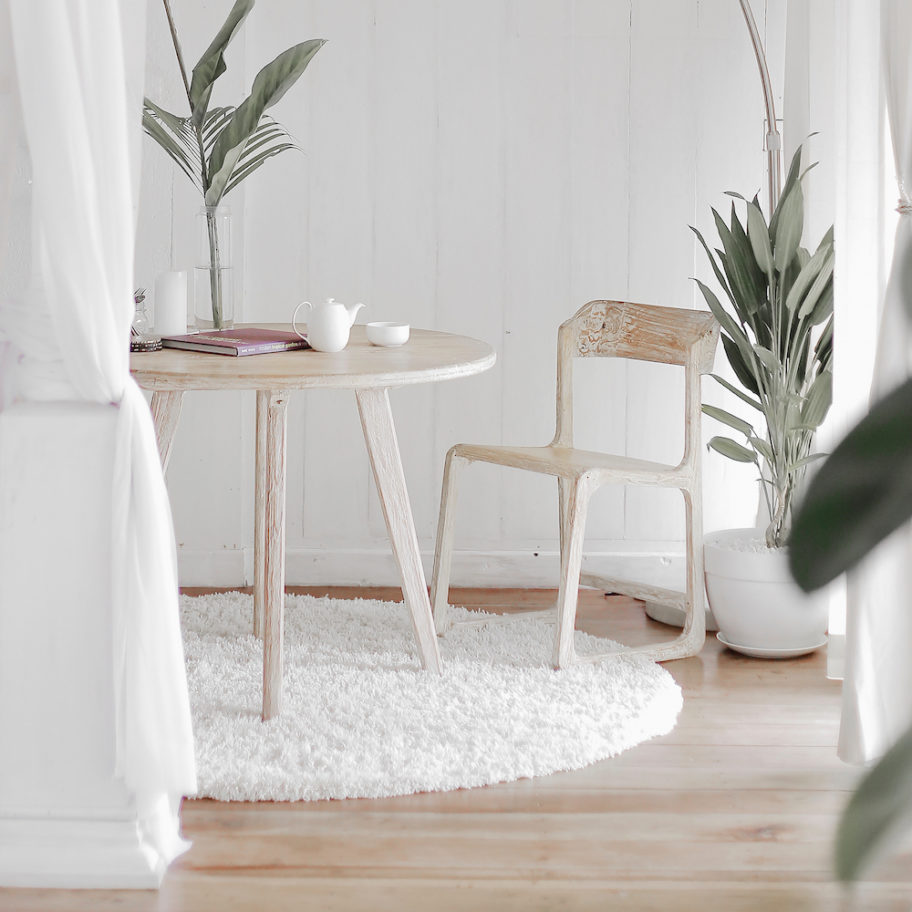
Suzanne’s kitchen table chairs started as a basic maple table. At least I’m assuming it’s maple. It could be a harder wood from Asia. The set was very yellow from the thick layers of polyurethane.
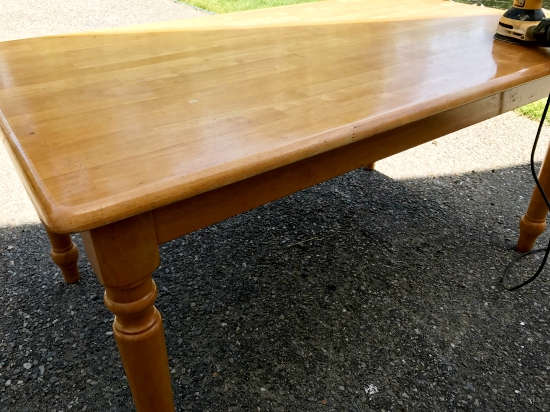
Four hours of sanding later, 85-90% of the color was able to removed with the sander; but even with a lot of hand-sanding it’s still very difficult to get the wood to a completely natural state.

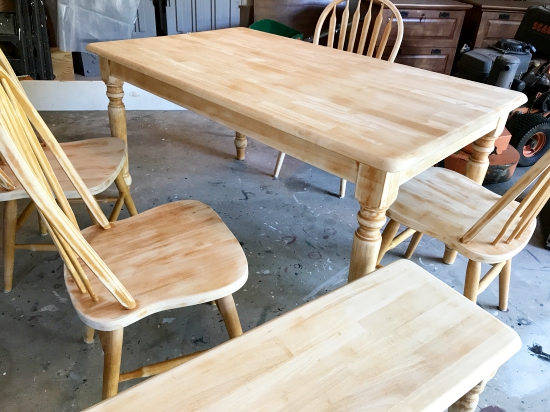
So what do we do? We work with the wood. It’s actually the best part of the refinishing process – knowing that the end result will be 100% original.
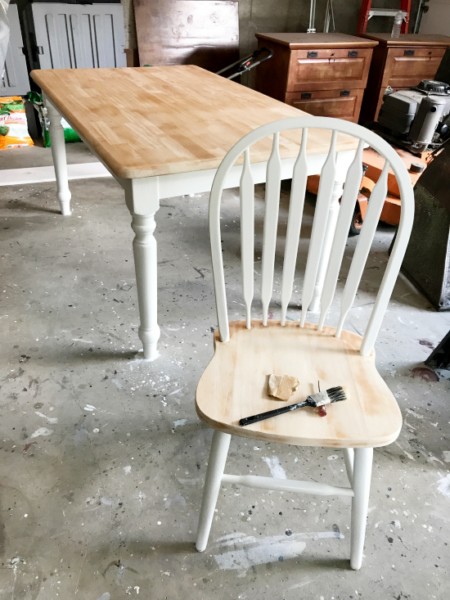
Suzanne’s vision was always to go with a China White base to match her newly painted kitchen cabinets. Painting with white even on this light wood can be a challenge. It has to be primed with a shellac primer like BIN to prevent the remaining yellow tones from bleeding through the white paint. BIN is the best primer I’ve found for this.
Once two coats of the primer cured overnight, three coats of a high quality enamel were brushed on, allowing a few hours between each coat.
It was time to stain the top. To give Suzanne some visual ideas, I created this Pinterest board for dining room furniture.

The original plan – based on this particular pin of an oak table – was to wash the top and seats in Minwax weathered oak. The goal was to get to a weathered gray.
I experimented on the small bench figuring it could be quickly sanded down again if needed. Unfortunately, Weathered Oak stain didn’t work on the maple wood the same way it worked on oak.
Weathered oak is like a clear stain that brings out whatever color is already naturally in the wood. With oak, that natural color is a gray tone. With maple wood, it’s yellow. That’s definitley not what we wanted to go back to.
To counteract the yellow and get closer to gray, I tried adding a whitewash stain then a dark walnut. Needless to say it didn’t work.
Here’s the thing with maple wood; maple is such a hard wood that stain rarely absorbs evenly. Case in point…

Pretty aweful isn’t it? Splotchy. It had to go. A quick sanding removed the stain and got me back to the natural wood once again.
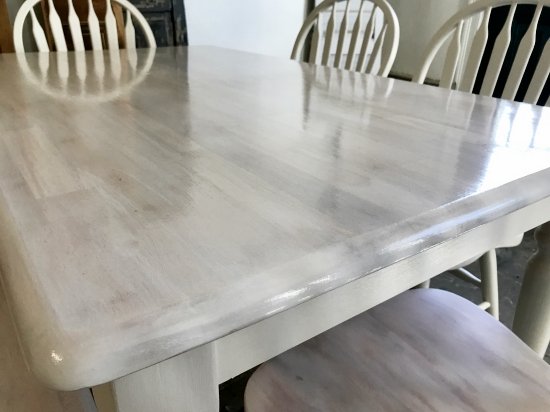
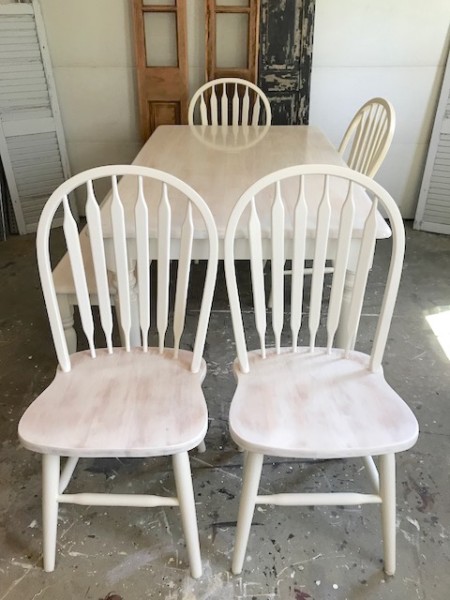
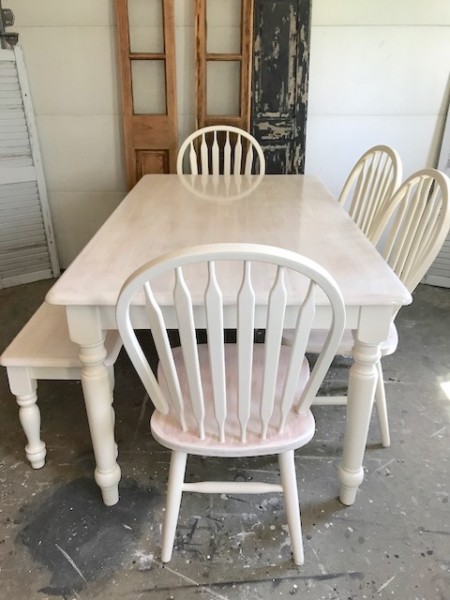
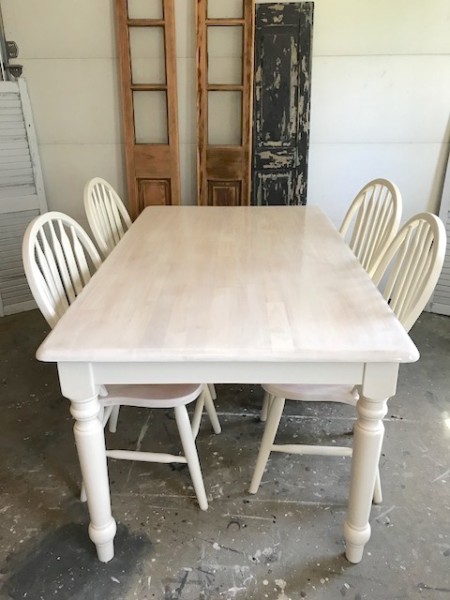
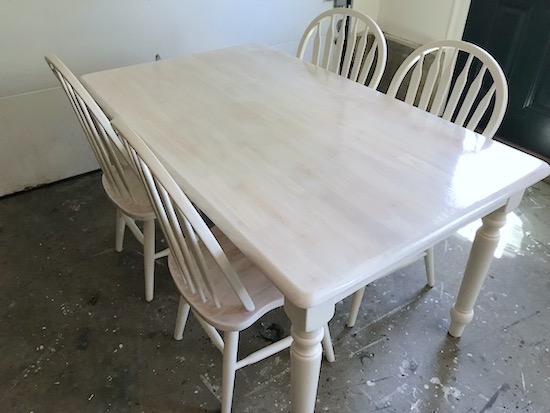
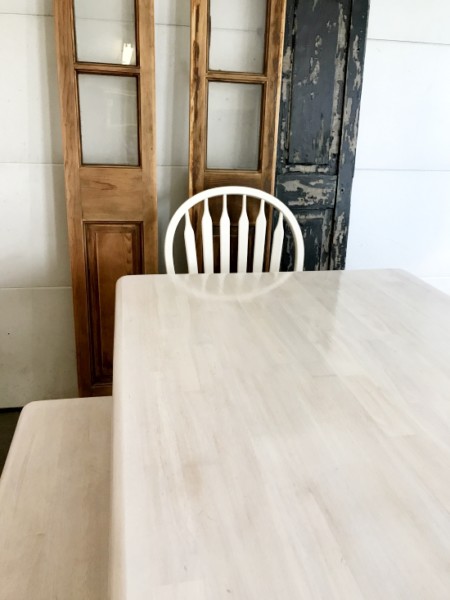
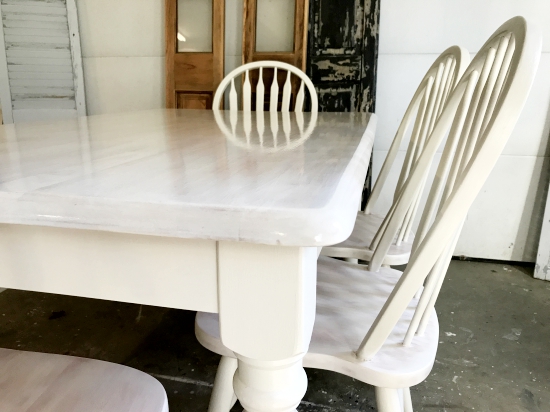
At this point, I called Suzanne over to re-visit the original plan. We had to find a stain that would either completely cover the shadings in the wood (like a dark walnut or expresso gel stain) or work with them. We opted to work with the shadings and to white wash the tops and it turned out beautiful!
Here’s a chair with one coat of the whitewash stain.
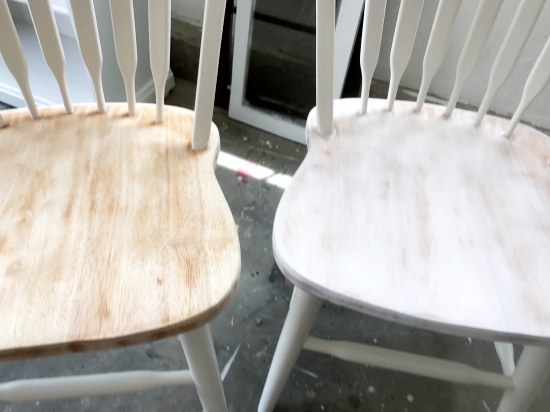
And here it is with two coats…
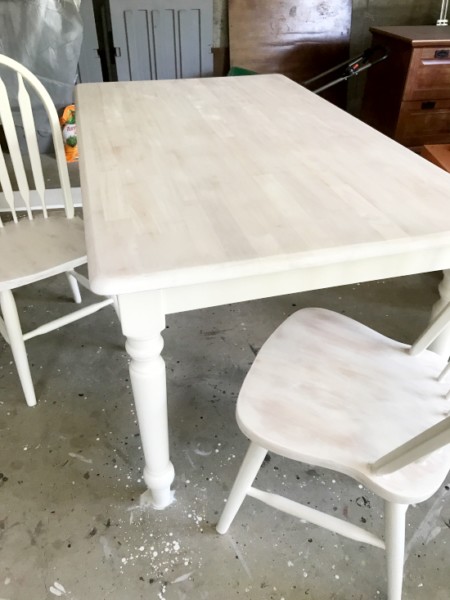
The Minwax semi-solid whitewash stain offered enough coverage to cover the yellow tones, but still let the wood grain and shadings show through, resulting in a very original finish.
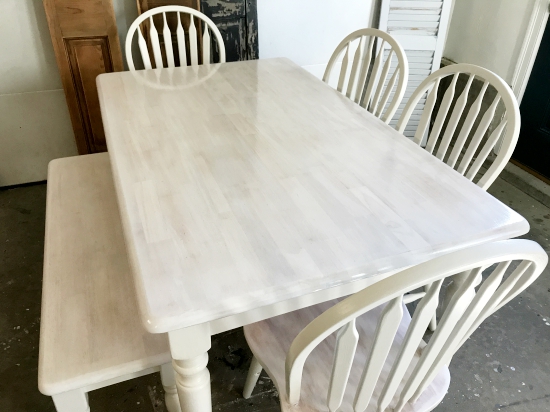
From there, three coats of Minwax matte polycrylic were brushed on to protect the stain. The matte finish was perfect, but I panicked a little in the end and added a coat of Benjamin Moore’s Stay Clear to the table top. The little bit of extra gloss will allow Suzanne to more easily wipe the table down and wash it with less worry.
Ok. Enough from me. Enjoy the finished photos…
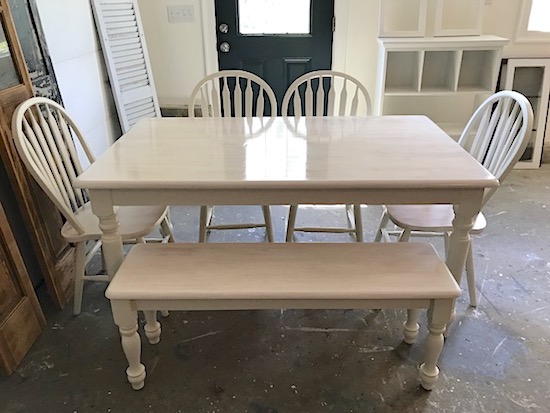


And the final before & after…


If you’d like to furnish your home for pennies, click the image below.
You’ll receive FREE, immediate access to my newest ebook:
I even reveal how I make my biggest profits flipping furniture!
If you live in the Boston area and have solid wood furniture pieces that need an update, let’s talk about how paint or stain could transform them. See this info on my custom furniture painting & staining services…

Disclaimer: This post may contain affiliate links to products I love and use myself.


How I wish you stayed closer Vicki. Your work is always so incredibly professional. Everything looks gorgeous. That finish is to die for. Wow!!!
Thank you Michelle. Your crafts at acraftymix.com are equally stunning!
That table turned out beautifully! I love it whitewashed! Just for your future endeavors, you may want to use wood pre-stain conditioner ( Minwax makes one) before you stain. It allows the wood to more evenly absorb the stain.
Jeannee
Thank you Jeannee. Great tip to use the pre-stain conditioner. I have used it before and it works well on most woods. I’ll have to re-stock on that 🙂
Wonderful furniture refab , love the new finish and that kitchen makeover wow! What a fresh new look. Thanks for sharing it at #fridaysfurniturefix .
Vicki that is one beautiful transformation. I love the shine on the top of the table. It looks as tough as nails just what you need for a table top. The whole kitchen is gorgeous.
Looks great! How long did you let the stain sit for before wiping it?
The white stain was a water-based stain that I wiped on with a rag. I added a second coat as soon as it was dry to the touch which was in about 30 minutes.
I am so grateful I came across this blog post. We (aka my husband) have sanded down and two-part bleached a dining room table that is most likely maple (maybe a red maple?). After using the Zinsser two-part bleach 3 times the lightness of the table is great, but there is a yellow undertone that I hate. I want a more Scandinavian wheat/blonde color and less of a yellowed tone. So, I started exploring whitewashing. I’m not a big fan of the farmhouse white washed look. But I wonder if whitewashing the maple table of our could even out the yellow tones. Any thoughts? Thank you so much for all of this information.
Rachel. Since you already bleached the table it will be important to neutralize the bleach before applying any other finish. [This is from a Bob Villa article… Let dry for at least 4 hours. Then wipe it down with a rag soaked in a 50-50 water and white vinegar solution. Next, wipe it dry with a clean rag, and finally wipe it down again with clean water, drying well with a clean, dry, soft cloth. Let dry completely for two days before applying a stain or other treatment. Neglecting to neutralize after your final application may leave lingering bleach to chemically react with whatever finishing stain or varnish you apply next.]. That being said, the yellow of a maple table could bleed thru a stained finish over time. So don’t be surprised if you if your whitewashed table shows variations in color over time. The table you see in this post actually bled a slight pinkish tone. To minimize, sand the table completely. Add several coats of the water-based whitewash pickling stain. If you see a lot of yellow that comes thru in a few days after staining, you can use a more solid water-based gray stain, then continue the whitewash stain over that until you achieve the desired color. Do not rush the project and wait several days between coats to see if there’s any color change before applying any final clear topcoat.
Hi – You mention in this post that you used ” Minwax Semi-solid White Wash Stain” Could you take a picture of the can you used, because when I google it, there is no such product. The Semi-solid has me confused. Thanks!
Rosebeth, I think Minwax may have changed the label of the semi-solid white wash stain and are now marketing their water-based stains as these semi-transparent water-based wood stains: https://www.minwax.com/wood-products/stains/minwax-wood-finish-waterbased-semitransparent-color-stain